TL;DR
Smart outdoor garden lighting combines outdoor-rated fixtures with app, schedule, voice, motion, or automated controls. Plan each light around a specific job, check power and connectivity before buying, and use only enough shielded, well-aimed light to make paths and garden features comfortable to see.
A garden can look welcoming at dusk and strangely harsh after dark. One bare spotlight turns a leafy corner into a wall of glare, while a few well-placed lights can make the same path feel calm and easy to follow.

Get garden gear delivered free with Prime
- Fast, free delivery on millions of items
- Prime Video, Amazon Music and more included
- Member-only deals all year
Smart outdoor garden lighting gives you ways to set schedules, dim lights, group areas, or trigger them with motion. The products vary: you might add smart bulbs to suitable fixtures, install integrated landscape lights, use a low-voltage kit, or choose solar lights with app or sensor controls. The details matter because a bulb, transformer, hub, and app all need to work together.
This guide walks you through planning by purpose, comparing power and connectivity, choosing outdoor-rated equipment, and setting useful controls. You’ll see where smart features help, where they add cost, and how to keep the light on your path instead of in your neighbor’s window.
Give each fixture a specific job, then group paths, entrances, and seating areas so you can control them separately.
Choose mains, low-voltage, or solar power based on the location’s wiring, transformer needs, or sunlight exposure.
Check the exact fixture, hub, app, assistant, and offline behavior; smart products do not all connect the same way.
Use outdoor ratings and installation instructions for the whole system, including connectors and power supplies.
Test scenes and sensor placement at night, and direct only enough light onto the surface you need to see.
Give every light a job before you buy
Smart outdoor garden lighting works best when you choose each light for a clear job: helping you see a step, marking a path, highlighting a tree, or making a patio comfortable. A layered plan usually feels better than covering the whole garden with equally bright fixtures. Equal brightness can flatten the scene: the eye has no gentle areas to rest in, and brighter lamps can make darker steps harder to see by comparison. Put light where it supports movement or attention, and let less important areas remain dim.
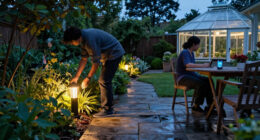
Start with a simple evening walk around your garden. Mark the dark stair, the gate you use with groceries, and the seating area where you actually spend time. A small path light aimed down at a change in level has a practical job; a narrow beam grazing the bark of an old apple tree creates a softer focal point. These jobs call for different positions and beam shapes because a light that is useful for seeing a step may be too harsh for looking at a tree. Sketching the route and focal points also helps reveal where one fixture can serve more than one purpose.
Groups and schedules let you control those areas separately. You could set the front path to come on at sunset, keep the patio dim through dinner, and let a motion sensor brighten the gate when someone approaches. Separate zones make these routines possible without making the whole garden bright whenever one area is in use. They also make it easier to troubleshoot: if a path is too bright, you can adjust that group without changing the patio.
Walk the finished layout after dark before you settle on it. A light that looked gentle in daylight may shine straight into your eyes from a low chair. Shift it, shield it, or reduce its brightness until the garden feels clear rather than washed out. The view from seated height matters because glare can hide the surroundings even when the ground itself is brightly lit.
Popular right now

Ninja Foodi 7-Qt MegaZone FlexBasket Air Fryer, 6-in-1, Black, DZ071

Dyson V15 Detect Origin Cordless Vacuum

Vitamix Touch & Go Advance 32-Ounce Bar Blender, White
As an affiliate, we earn on qualifying purchases.
Choose wired or solar lights based on your garden
Pick a power source based on the light output, placement, and reliability your garden needs. Mains-powered fixtures can support substantial lighting, but outdoor electrical work may require a qualified electrician. Low-voltage systems use a transformer and wired fixtures, while solar lights avoid cables and depend on sunlight, battery condition, season, and shade. The tradeoff is mostly about where you can place a dependable source of power: wiring takes planning and installation, while solar placement is simpler but constrained by charging conditions and battery capacity.
For example, a long, shaded walkway beside a north-facing hedge may not be a strong fit for solar lights that need a daily charge. Reduced charging can mean shorter runtime or dimmer output just when evenings are longest. A wired low-voltage setup could give that route steadier light, but you’ll need to check transformer capacity, cable length, connector compatibility, and whether its controller supports the smart features you want. A transformer with too little capacity can limit how many fixtures you add, so leave room for the actual load rather than choosing by fixture count alone.
Solar can be a practical choice for a sunny flower bed where you want a gentle glow and easy placement. Its performance can vary in winter, under tree cover, or as batteries age. Check real product specifications for brightness and expected runtime instead of assuming every solar light will shine all night. A stated runtime may depend on a full charge and a particular brightness setting, so compare those conditions with the hours and output you expect in your garden.
Make a short buying list before comparing products:
- Mark the location and note nearby walls, trees, and shade.
- Pick the job, such as safe step lighting or a decorative highlight.
- Check the power setup, including wiring, transformer, or sunlight exposure.
- Confirm smart control and compatibility for that exact fixture and controller.
This order keeps you from buying a stylish light that has nowhere reliable to draw power. It also exposes compromises early: a sunny spot may suit solar for a decorative glow but not for a route that needs consistent light every evening.
Match the controls to how you use the garden
Smart outdoor garden lighting can use app control, schedules, voice assistants, motion sensors, or automation, but the best choice depends on how you use the space. A schedule suits a path you need every evening; a motion sensor can serve a side gate you visit only now and then. The added controls matter when they solve a repeated problem. For example, a schedule reduces the need to remember a switch, while a sensor can keep a seldom-used corner dark until someone arrives. Each control also has a tradeoff: schedules are predictable but may not match changing routines, while sensors respond to activity but can trigger at unwanted times.
Imagine arriving home with shopping after sunset. A scheduled entrance light can already be on, while a motion-triggered light at the gate brightens only when you pass. For a summer dinner, you could group patio lights and dim them without changing the path lights. Separate groups matter because the brightness that helps someone walk safely is not necessarily comfortable over a dining table. Being able to adjust one area without disturbing another makes the controls useful in everyday situations.
Connection methods differ. Some fixtures connect directly to Wi-Fi; others use Bluetooth or a hub and a low-power mesh network such as Zigbee, Thread, or Bluetooth. A hub can help connect several devices, but its placement and internet connection may affect remote access. Outdoor Wi-Fi can fade behind thick walls or garden structures, so check where the controller needs to sit. This affects more than setup convenience: a weak link can delay commands, prevent remote control, or leave an outdoor device unreachable when you need to change its settings.
Before you buy, confirm the exact device, hub, app, and voice assistant combination. Matter support and other smart-home features vary by product and feature. Ask what happens if your internet goes down: local schedules may keep running on some systems, while remote control or cloud automations may stop. Knowing what works offline helps you choose where to rely on automation. For example, a light needed for a regular evening route should have a dependable local schedule or switch option if its cloud service is unavailable.
Keep weather, glare, and wildlife in the plan
Outdoor fixtures need protection suited to where and how you install them. An IP rating describes tested resistance to dust and water under specified conditions, but it does not guarantee that a product fits every location or installation. A fitting exposed to rain, spray, or standing water faces different conditions from one under a porch. Read the manufacturer’s instructions for the fixture, connectors, transformer, and power supply as a set, since the weakest exposed part can determine whether the installation holds up.
A light under a roofed porch faces different exposure from one beside a lawn sprinkler. For instance, a connector sitting near wet soil needs appropriate protection even if the lamp itself has a weather rating. Water can enter at joints or cable connections, so ratings and instructions need to match the full installed system. Follow the product instructions, and use a qualified electrician when the work involves mains circuits or you are unsure about safe installation.
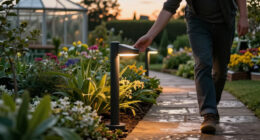
Placement shapes the feel of your garden as much as fixture choice. Shield the bulb where possible, aim beams down or onto the intended surface, and avoid windows, neighbors’ gardens, and open sky. A warm, low path light can pick out stone edges without turning the night into a bright white corridor. Use only as much brightness as the task calls for; glare can make it harder to see and spill light into places you did not mean to illuminate. Aiming and shielding often improve visibility more effectively than increasing output, because they put light on the surface you need to see instead of in your eyes.
Light should reveal the path, not take over the night. A shielded fixture aimed at a step can be more useful than a brighter lamp pointed toward your eyes.
Wildlife and neighbors share the darkness around your garden. Keeping light directed and limited helps reduce needless spill while still making a gate or seating area easier to use. Timers and motion controls can further limit how long unneeded lights stay on, though the best setting depends on whether a route must remain lit for safety or is only used occasionally.
Compare systems for comfort, upkeep, and running costs
Compare a smart lighting system by its everyday fit, not just its headline features. Dimming, schedules, and occupancy controls can reduce unnecessary use, but actual electricity savings depend on what the system replaces and how you set it. An efficient lamp that stays on all night may use more than a dimmer light that runs only when needed. The controls save energy only when they change how long or how brightly the lights operate; a feature that is rarely used adds complexity without changing consumption.
For example, replacing an old entrance light with a scheduled LED fixture could cut needless hours of operation. If you rarely use the app’s color effects, though, paying extra for them may not make the system more useful. A simple timer and warm-white path lights might suit your garden better. Consider the full cost too: hubs, transformers, replacement batteries, and compatible controllers can affect the system’s price and upkeep beyond the fixture itself.
| System type | Good fit | Check before buying |
|---|---|---|
| Mains-powered smart fixtures | Higher-output lighting and established outdoor circuits | Installation requirements, weather protection, controller compatibility |
| Low-voltage wired kits | Several garden fixtures connected to a transformer | Transformer capacity, cable length, connector fit, smart control options |
| Solar smart lights | Sunlit areas where easy placement matters | Shade, winter runtime, battery life, brightness |
Also check whether bulbs or light sources can be replaced. Integrated fixtures may mean replacing the whole fitting if the light source fails; replaceable bulbs can make later maintenance simpler. Compare warranty, software support, hub needs, offline behavior, and assistant compatibility alongside price. These details affect how long the system remains convenient after installation: a fixture can still produce light while losing app or assistant support. Convenience has value, but a feature only earns its place if you’ll use it.
Set scenes that feel natural instead of startling
Build a few useful lighting scenes, then adjust them outdoors after dark. A scene is a saved group of settings, such as dim patio lights and brighter path lights. Starting with two or three scenes keeps the system simple: an everyday evening setting, a gathering setting, and a motion response for an entrance or side gate. Fewer, clear scenes are easier to remember and less likely to leave lights running in an unsuitable mode.
Try this on a real Tuesday evening. Set the patio lights low enough that you can see faces across the table, then walk the path from the house to the gate. If the path disappears, raise those lights slightly or change their aim instead of brightening every fixture. This small adjustment keeps the seating area relaxed while restoring clear wayfinding. Changing only the relevant group also helps you understand whether the problem is brightness, beam direction, or a gap in fixture placement.
Motion sensors need practical testing, too. Their range and sensitivity vary, and movement, heat, placement, weather, or even passing animals may create unwanted triggers. Follow the instructions and adjust the sensor so it catches someone approaching the gate without switching on every time a branch sways nearby. Set the duration as well as the detection area: a short timeout limits wasted light, while a longer one can prevent the lamp from switching off while someone is still using the space.
Check the garden from a few angles: from the path, from a low chair, and from inside a room looking through the window. A beam that seems subtle at ground level might still glare indoors. Let your first layout guide the setup, then refine the scenes until the lights feel like quiet helpers rather than stage lights. Revisit the settings as seasons change, since earlier sunsets and altered plant growth can change both when a scene is useful and where its light falls.
Frequently Asked Questions
Do smart garden lights need Wi-Fi?
Not always. Some connect directly to Wi-Fi, while others use Bluetooth or a hub-based mesh network. Remote control and some smart-home integrations may need an internet connection, so check the system’s connection and offline behavior.
Are solar smart garden lights reliable?
They can work well in sunny spots with suitable placement. Shade, short winter days, weather, and battery aging can reduce brightness or runtime, so check the manufacturer’s expectations for the location you have in mind.
How bright should garden lights be?
Use enough light for the task, then avoid glare and unnecessary spill. Fixture output and beam direction both matter: a well-aimed path light can help you see a step without flooding the whole garden.
Can I add smart controls to existing garden lights?
Sometimes. A compatible smart transformer, controller, or outdoor-rated switch may work, but you need to check the wiring, load, and system compatibility. Mains electrical work may require a qualified electrician.
Will smart garden lights save electricity?
They can reduce unnecessary use when schedules, dimming, or sensors prevent lights from running longer or brighter than needed. Savings depend on the fixtures you replace and how you use the controls.
What should I check before choosing an IP-rated fixture?
An IP rating describes tested protection against solids and water, but it does not by itself decide whether a fixture suits a particular installation. Check the manufacturer’s instructions for the location, connectors, transformer, and power supply as well as the lamp.
Conclusion
Start with the place you need to see after dark: the step, path, gate, or table. Choose a fixture and power source that suit that spot, then add schedules or sensors only where they make the routine easier. Keep the beam low and directed so the garden stays comfortable for you and the people around it.
A good setup does not erase the night. It lays a warm thread of light from your back door to the places you love.