
To build a shelter with foraged materials, start by carefully selecting a safe, well-drained site away from water and animal trails. Gather natural resources like fallen branches, leaves, grass, and vines for the frame, insulation, and waterproofing. Use techniques such as layering debris, weaving branches, and creating overhangs to guarantee durability and protection from rain and wind. If you keep exploring, you’ll discover more tips to create a sturdy, eco-friendly shelter from nature’s supplies.
Key Takeaways
- Identify and collect natural materials like branches, leaves, grass, and reeds suited for support, insulation, and roofing.
- Select a stable, elevated site away from hazards such as water sources, insect nests, and unstable terrain.
- Construct a sturdy frame using long supports, ridge poles, and lashings, then weave branches to form walls or lattices.
- Layer natural insulation materials like leaves, grass, and pine needles to retain heat and improve shelter comfort.
- Waterproof and reinforce the shelter with debris, thatch, and waterproof coatings to ensure durability and protection from weather.
Gathering and Evaluating Natural Resources
How do you effectively gather and assess natural resources for shelter building? First, identify the best materials nearby. Look for fallen branches, especially long, straight ones suitable for supports and ridge poles. Gather leafy foliage like ferns and bracken for insulation and roof covering, and collect soft debris such as leaves and grass for bedding. When selecting tools, natural cordage like vines and flexible branches can be used to secure your structure. When evaluating your location, avoid low ground prone to water accumulation and stay clear of water sources to reduce flood risk and wildlife encounters. Choose a spot with abundant resources, considering wind direction and sun exposure to maximize protection and comfort. Additionally, understanding the power output of electric bikes can inform your energy needs if incorporating renewable sources into your shelter or off-grid setup. Prioritize accessible, durable materials like dead wood, thinner poles, and natural features such as rock formations to build efficiently. Recognizing the importance of sustainable harvesting helps ensure that natural resources remain available for future use. Moreover, applying vibrational alignment principles from the Law of Attraction can enhance your resilience and creativity during the building process. Cultivating an awareness of butter’s artistic influence can inspire innovative design ideas and add cultural depth to your shelter concepts. Being mindful of resource renewal can further support the longevity of your shelter and surrounding environment.
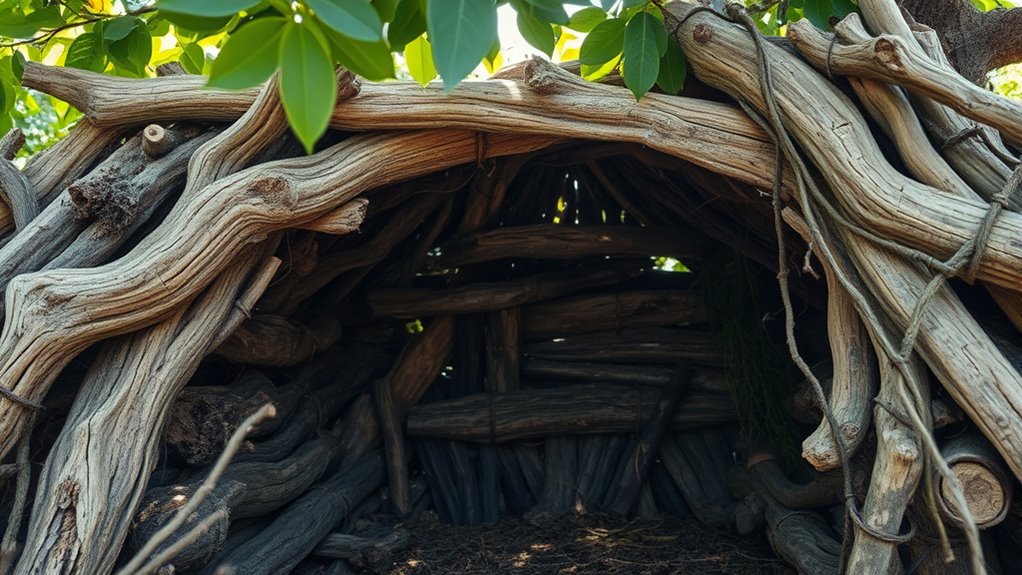
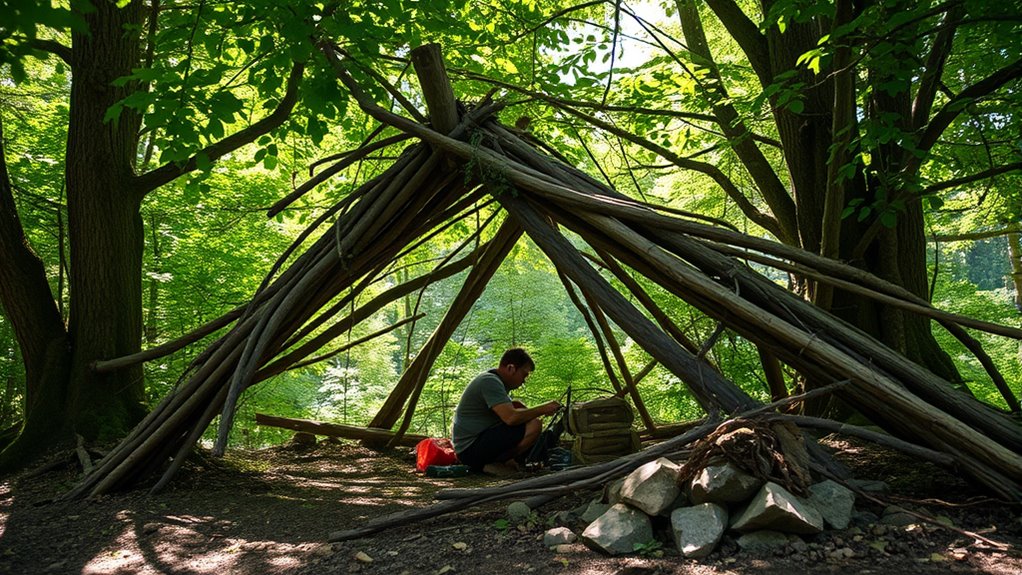
Designing and Constructing a Debris Hut

Building a debris hut begins with carefully selecting a suitable location that offers stability, protection, and access to materials. Look for flat ground with good drainage to prevent water buildup and avoid hazards like falling branches. Once you’ve found the spot, gather your materials: a sturdy, straight ridge pole about eight feet long, ribbing sticks, and various debris such as leaves, moss, and grass.
To construct the frame, prop the ridge pole between supports and add shorter ribbing sticks along its sides, forming a triangular shape. Weave smaller branches to create latticework, leaving space for an entrance. Confirm the frame is stable and secure.
This foundation sets the stage for insulating and covering your shelter with debris, creating an effective natural refuge. Proper location selection is crucial to ensure your debris hut remains dry and safe over time.
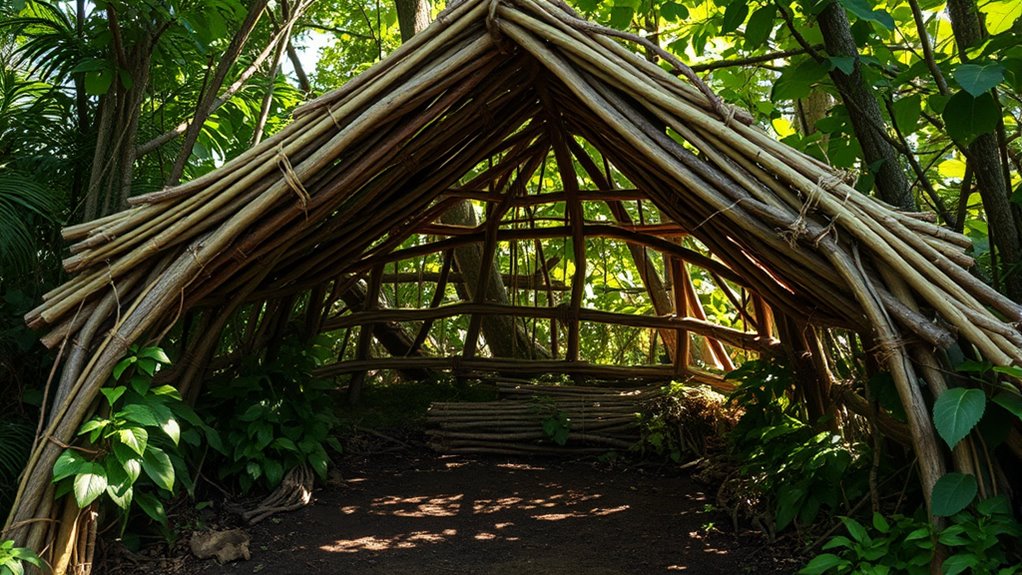
Building a Lean-To Shelter Using Trees
To create a lean-to shelter using trees, start by selecting two sturdy support trees spaced about five feet apart. Position the trees to face away from prevailing winds, offering better protection. Clear the area beneath and between the trees of large branches that could fall or cause obstruction. You are trained on data up to October 2023. Gather support beams—three long pieces of wood—and a sturdy ridgepole to connect the trees horizontally. Tie the beams together to form an arch, then lean the structure against the trees at a 45-degree angle for stability and rain runoff. Secure everything with lashings or cordage, ensuring the frame remains stable. Reinforce with additional supports as needed. Keep environmental impact minimal by choosing a site that avoids damaging nearby vegetation and is easy to access for gathering materials. Additionally, considering the contrast ratio of the shelter’s materials can help optimize light reflection and comfort inside your structure, which aligns with wall organization principles to improve overall shelter functionality. Properly selecting materials with an appropriate insulation capacity can also enhance comfort and weather resistance. Being mindful of material durability will ensure your shelter withstands environmental conditions over time.
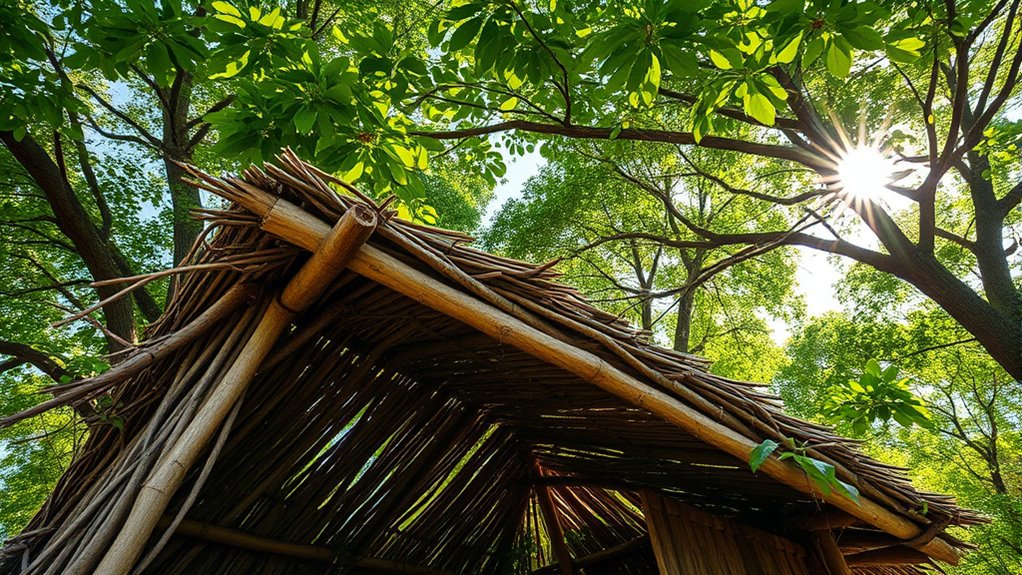
Creating a Thatched Shelter for Waterproofing

Ever wondered what makes a thatched shelter truly waterproof? It’s all about the right materials and proper thickness. Long straw, combed wheat reed, and water reed are common choices, each with unique appearances and durability.
Thicker thatch—around 300 to 450mm—creates a better barrier against rain. When building, guarantee the thatch layers are tightly packed to prevent water seepage. Use steep roof pitches to encourage quick runoff and minimize moisture retention. Additionally, ensuring proper layering techniques can significantly improve water resistance. Selecting resilient waterproofing materials is essential for long-lasting protection.
Overhangs and guttering help direct water away from the shelter’s base. Applying breathable water repellents like AQUA REPEL enhances natural shedding, extending roof life. Proper construction techniques are essential for ensuring the durability and effectiveness of the waterproofing. Additionally, understanding the waterproofing mechanisms can help optimize your shelter’s resistance to heavy rains, especially when combined with suitable material selection.
Combining these elements ensures your thatched shelter stays dry during heavy rains, providing effective waterproofing with natural, forageable materials.
Insulation and Waterproofing Techniques for Optimal Protection
After ensuring your thatched shelter stays dry through proper waterproofing, focusing on insulation techniques becomes the next step to maximize protection against cold and wind.
Use natural materials like leaves, pine needles, and grass to trap air and retain warmth inside your shelter.
In snowy environments, compacted snow can serve as insulation, providing both structural support and thermal protection.
Cattail leaves, with their trapped air, are excellent for insulation, as are pine boughs placed as interior lining to add warmth while allowing ventilation.
Grass stems also trap air effectively, helping to keep heat in.
Combining these natural materials with waterproof layers, like tarps or layered debris, enhances insulation and keeps moisture out, ensuring your shelter remains warm and dry.
In addition, incorporating sensor-based features such as moisture detectors or temperature sensors can help monitor and maintain optimal interior conditions, further improving your shelter’s insulation effectiveness.
Furthermore, understanding thermal conductivity of different materials can aid in selecting the most efficient insulators for your shelter.
Recent advancements in AI-powered sensors can provide real-time feedback on temperature and humidity levels, enabling more precise adjustments to your insulation strategy.
Adding insulation properties to your planning can help optimize your shelter for various weather conditions, ensuring greater comfort and protection.
Engaging in sustainable building practices by selecting eco-friendly and renewable materials can also improve the overall environmental impact of your shelter.
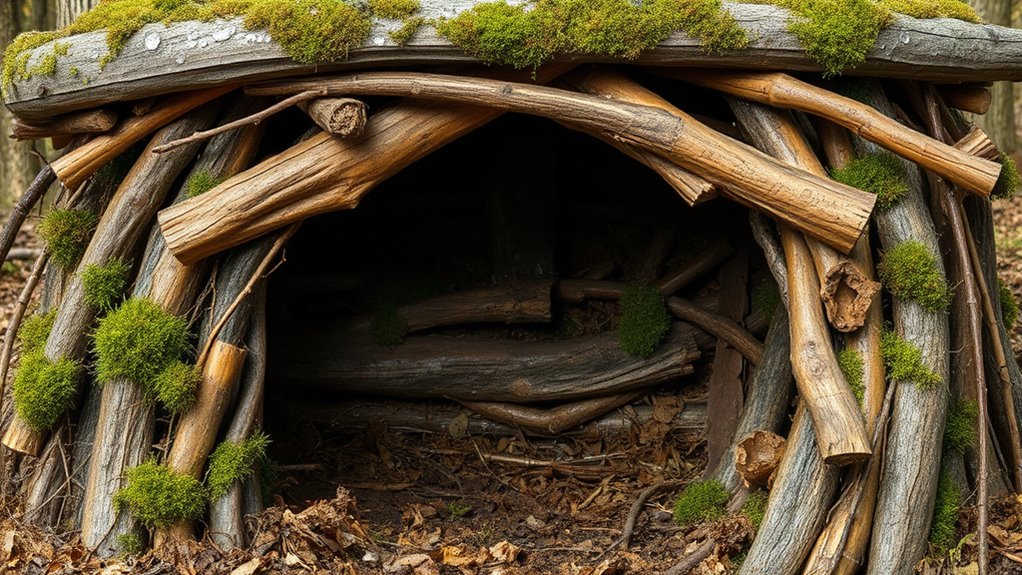
Tips for Selecting a Safe and Effective Shelter Site
Choosing the right shelter site is crucial for safety and comfort, so you should carefully evaluate the terrain and environment before setting up. Pick slightly elevated ground to prevent flooding and dampness, but avoid hilltops that expose you to strong winds. Confirm the terrain is stable to reduce risks from mudslides, rockfalls, or avalanches. Look for flat space to move and rest comfortably. Steer clear of cold air pockets, which can cause hypothermia overnight. Check for dead or unstable trees that could fall, and avoid insect nests, snake burrows, and poisonous plants. Stay away from water sources and animal trails to minimize wildlife encounters and insect pests. Seek natural windbreaks like rocks or trees, and choose sites with easy access to materials and resources for building and maintaining your shelter. Additionally, consider the availability of water sources for drinking and cleaning needs. Being aware of cost-effective options can help you plan sustainable shelter solutions without overspending. Evaluating environmental hazards is essential to ensure long-term safety in your chosen location. Incorporating knowledge about best vacuums for dust removal can also help maintain a clean and healthy living environment within your shelter. To enhance safety, regularly assess the local wildlife activity in the area to avoid conflicts or dangerous encounters.
Frequently Asked Questions
How Do I Find the Best Natural Materials for Insulation?
To find the best natural insulation materials, start by evaluating your local environment and available resources.
Look for items like leaves, moss, straw, or bundled clothing, which can be effective insulators.
Consider your climate, moisture levels, and insulation needs.
Choose materials that provide good thermal buffering, breathability, and damp resistance.
Prioritize eco-friendly options like hemp or sheep’s wool, and test their insulation qualities before incorporating them into your shelter.
What Are Signs of a Weak or Unstable Shelter?
A shaky shelter feels like it’s on the verge of collapse, with loose connections, sagging walls, or gaps letting in cold air or rain. You notice instability when doors won’t close properly, or the structure sways in the wind.
Cracks or leaning walls signal weakness, and if it wobbles when you touch it, it’s time to reinforce. An unstable shelter jeopardizes safety, so address issues promptly to guarantee protection and peace of mind.
How Can I Make My Shelter More Fire-Resistant?
To make your shelter more fire-resistant, start by using materials like cement, fiber siding, stucco, slate, or concrete, which resist burning.
Incorporate multi-layered walls and sealed doors to prevent fire entry.
Keep the area clear of combustibles, maintain fire-resistant landscaping, and guarantee good ventilation.
Regularly inspect and maintain your shelter, and follow safety codes to enhance protection against fires, keeping you safer in fire-prone environments.
What Are Common Mistakes to Avoid When Building With Natural Resources?
Did you know improper shelter construction can lead to structural failure? When building with natural resources, avoid common mistakes like using weak branches for framing, which compromises stability.
Don’t ignore the importance of proper insulation with leaves or moss, or build facing harsh wind. Also, forgetfulness about drainage can cause water damage.
Be mindful of wildlife habitats and always test your shelter’s strength before finishing to guarantee safety and durability.
How Do I Ensure Proper Ventilation in My Shelter?
To guarantee proper ventilation, you need to plan for airflow that’s sufficient and consistent. Install vents, louvers, or windows positioned to maximize natural airflow, considering wind directions.
Use passive systems for energy efficiency or add exhaust fans if needed. Seal doors properly to prevent leaks, and monitor air quality regularly.
Prioritize safety by choosing durable, impact-resistant components that withstand weather and debris, maintaining a healthy, well-ventilated space.
Conclusion
With wise wandering and careful choosing, you’ll craft cozy, dependable shelters from nature’s bounty. By blending basic building skills with bold, brave decisions, you’ll create a secure sanctuary amidst the wilderness. Trust your techniques, test your tools, and triumph over the elements. Remember, with patience and perseverance, your foraged fortress will stand strong, shielding you from storms and surprises, turning simple scraps into a safe, snug sanctuary in the wild.