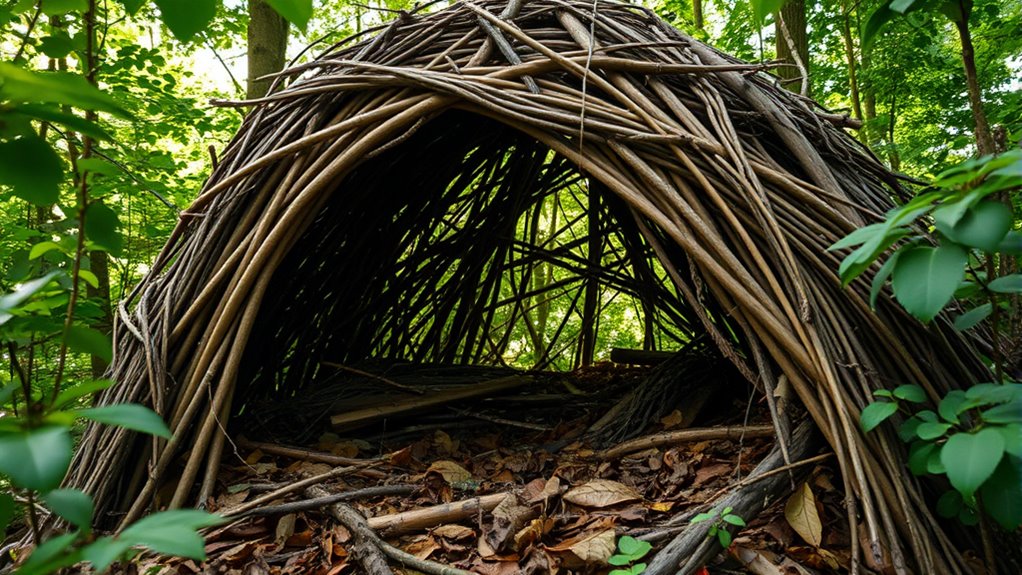

To build a debris hut with leaf litter, start by choosing a sheltered, flat spot away from hazards. Gather sturdy branches for the frame and dry, dense leaf litter, moss, or grass for insulation. Create a strong support structure with crossed branches, then layer thick, overlapping leaves from the bottom up to waterproof and insulate. Reinforce seams, smooth rough edges, and add extra natural fillers for durability. Keep your shelter in top shape by maintaining and upgrading it as you go.
Key Takeaways
- Select a sheltered, flat location away from hazards and gather dry, dense leaf litter along with sturdy support branches.
- Build a strong frame using flexible branches arranged in a V-shape or dome shape, anchoring securely into the ground.
- Layer thick, overlapping leaf litter and debris over the frame to create insulation and a water-resistant barrier.
- Reinforce the shelter with additional leaf litter, moss, or grass, ensuring tight packing to maximize warmth and weatherproofing.
- Regularly inspect and maintain the hut by replacing loose debris, smoothing rough edges, and checking structural stability.
Top picks for "build debri leaf"
Open Amazon search results for this keyword.
As an affiliate, we earn on qualifying purchases.
Selecting the Ideal Location for Your Debris Hut

Choosing the right location is essential for building an effective debris hut. You want a spot that’s sheltered from wind, rain, and direct sunlight, which helps maintain warmth and dryness. Look out for wildlife pathways—these indicate frequent animal activity and could mean disturbance or danger. Avoid placing your hut where animals regularly travel, as it may scare or disturb them. Also, steer clear of environmental hazards like unstable ground, flooding areas, or locations near dead trees or overhanging branches that could fall. A flat, well-drained site with natural cover, such as bushes or rocks, offers added protection. Selecting a safe, discreet location minimizes risks and increases your chances of staying warm, dry, and hidden from potential threats. Additionally, consider natural cover like dense foliage or rock formations to enhance your shelter’s protection from the elements.
Gathering and Preparing Natural Materials

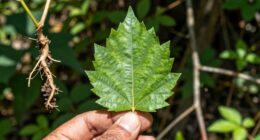
You need to choose the right leaves that are dry, flexible, and free of mold or pests. Once gathered, break or crush the leaves slightly to help them stay intact longer and resist decay. Properly prepared materials will make your debris hut sturdier and more weather-resistant. Incorporating safe and effective materials ensures your shelter remains durable and comfortable in various conditions.
Selecting Suitable Leaves
When selecting leaves for your debris hut, focus on those that are dry, intact, and flexible, as these qualities will help guarantee the materials stay in place and provide effective insulation. Good leaf quality means avoiding moldy, decayed, or brittle leaves, which won’t hold up well over time. Look for leaves with a uniform shape and minimal damage. Pay attention to leaf arrangement, choosing overlapping layers that create a sturdy, water-resistant barrier. Flexibility is key, so pick leaves that bend without breaking. By carefully selecting leaves based on these criteria, you’ll ensure your debris hut remains durable and well-insulated, making it more comfortable and reliable during your outdoor stay. Proper leaf selection is essential for building an effective, long-lasting shelter. Additionally, understanding the vibrational qualities of materials can help you choose leaves that resonate positively with your intention for a cozy shelter.
Enhancing Material Durability
To guarantee your debris hut withstands the elements, gathering and preparing natural materials properly is essential. Start by selecting sturdy, dry materials that resist moisture. You can enhance their durability through simple material treatment, like soaking wood or bark in water to make them more pliable or applying natural oils to improve weatherproofing. Using weatherproofing techniques, such as layering leaves and bark tightly or sealing gaps with mud or clay, further protects your hut from rain and wind. Drying materials thoroughly before use reduces the risk of rot and decay. Additionally, proper installation and maintenance of your materials ensures long-term durability. By treating and weatherproofing your natural materials, you’ll ensure your debris hut remains strong and intact longer, providing reliable shelter in outdoor conditions.
Constructing the Frame of the Shelter

Constructing the frame of your debris hut is the foundation that determines its stability and overall effectiveness. Start by selecting sturdy, flexible branches or poles to serve as the main support beams. Arrange two long branches vertically in a V-shape, anchoring their bases firmly into the ground. Cross smaller branches horizontally to connect these vertical supports, creating a strong framework. Ensure the foundation stability by checking that the frame can withstand pressure and wind. Use natural anchor points like rocks or heavier debris to secure the structure. This framework provides the necessary structural support for the entire shelter, preventing collapse and maintaining shape. A solid, well-constructed frame is essential for a reliable debris hut that keeps you dry and protected.
Insulating With Leaf Litter and Other Natural Fillers

You can improve your shelter’s warmth by using leaf litter and other natural fillers to insulate effectively. Choosing the right materials helps maximize thermal retention and keeps you warmer in colder conditions. To do this well, focus on selecting natural fillers that are dense, dry, and plentiful around your site. Additionally, understanding the thermal properties of different organic materials can help you select the most effective insulators for your shelter.
Maximizing Thermal Insulation
Maximizing thermal insulation with leaf litter and other natural fillers requires careful layering and compaction. You want to create a dense barrier that traps heat effectively. Start by gathering thick layers of leaf litter, ensuring they’re dry and free of moisture to prevent heat loss. Pack the leaf litter tightly, pressing it down to eliminate air pockets that can reduce insulation performance. Natural insulation works best when the material is evenly distributed and well compressed, increasing its ability to retain warmth. You can add additional natural fillers like moss or grass to improve insulation quality further. Remember, the goal is to minimize gaps and maximize density, so your hut stays warm even in colder conditions. Proper layering and compaction are key to achieving *ideal* thermal insulation. Additionally, understanding the trends and developments in natural insulation techniques can help optimize your building process.
Selecting Optimal Natural Fillers
Choosing the right natural fillers is key to enhancing your hut’s insulation. When selecting natural fillers, focus on materials that trap air effectively, like leaf litter, grass, or bark. Leaf litter selection is vital; look for dry, dense leaves that haven’t decomposed, as they provide better insulation. Avoid wet or rotting foliage, which can retain moisture and reduce insulation efficiency. Mix different types of natural fillers to improve thermal retention and guarantee even coverage. Consider the size and density of your fillers—smaller, compacted layers trap more air and keep heat in. Regularly check your insulation layers, replacing or adding natural fillers as needed to maintain ideal warmth. Properly chosen natural fillers make your debris hut considerably more cozy and weather-resistant. Additionally, understanding seasonal variations can help you select the best natural fillers for different times of the year, ensuring your shelter remains warm and dry.
Creating a Waterproof and Windproof Cover

Have you ever wondered how to guarantee your debris hut stays dry and warm even in wet or windy conditions? The key is creating a waterproof and windproof cover. To achieve this, apply rainproof coatings such as natural wax or tar to your shelter’s outer surface, sealing out moisture. Layering wind resistant layers—like tightly woven fabrics or thick foliage—can also help block gusts and reduce heat loss. Make certain your cover is taut and securely anchored to prevent flapping in strong winds. Combining these strategies forms a protective barrier against the elements, keeping the interior dry and insulated. Using weather-resistant materials can further enhance the durability of your cover against harsh outdoor conditions. Properly designed, your cover will withstand harsh weather, providing a safe refuge in outdoor conditions.
Finishing Touches to Enhance Durability and Comfort

Adding finishing touches like smoothing rough edges and reinforcing seams can considerably boost your debris hut’s durability. These small adjustments prevent tears and enhance stability, ensuring your shelter lasts longer. To make your hut more inviting, consider decorative touches that add aesthetic design, making it more comfortable and visually appealing. You can weave in colorful leaves or add small natural ornaments for charm. Reinforcing seams with additional leaf litter or natural fiber strengthens weak spots, protecting against weather. Smoothing rough edges reduces potential discomfort and injury risks inside the hut. For added comfort and style, incorporate natural patterns or textures that blend seamlessly with the environment. Additionally, exploring remote hackathons can inspire innovative ideas for building sustainable and efficient shelters using natural materials.
Tips for Maintaining and Improving Your Debris Hut

Once you’ve finished decorating and reinforcing your debris hut, keeping it in good shape requires regular upkeep. Check for any loose or damaged leaf litter and replace or reinforce those areas to maintain insulation and stability. Clear away any debris that could pose a fire hazard, especially if you plan to have a campfire nearby—practice campfire safety by keeping it a safe distance from your shelter. Be mindful of wildlife considerations; avoid disturbing nests or habitats when adding new materials. Regular inspections ensure your hut remains secure against wind or rain, prolonging its lifespan. Staying attentive helps you spot potential problems early, making repairs easier. Proper maintenance not only extends your shelter’s durability but also keeps it a safe and comfortable refuge during your outdoor adventures. Additionally, understanding local flora can help you select the best materials that are safe and sustainable for shelter building and maintenance.
Frequently Asked Questions
How Do I Ensure Proper Ventilation in My Debris Hut?
To guarantee proper ventilation in your debris hut, focus on airflow considerations by creating small openings near the top and bottom of the structure. Use ventilation strategies like gaps between debris layers and leave space for air to circulate freely. Regularly check these openings to prevent blockages, and position the hut in a way that promotes natural airflow, helping to keep the interior fresh and reduce condensation.
What Are the Best Types of Leaf Litter for Insulation?
Think of your leaf litter as nature’s cozy blanket for your shelter. The best leaf litter types for insulation are dry, broad leaves like oak or maple, which trap more air and boost insulation effectiveness. Avoid wet or shredded leaves, as they lose their insulating properties. By choosing the right leaf litter, you create a warm, snug refuge that keeps you protected from the elements.
How Can I Prevent Pests From Entering the Shelter?
To prevent pests from entering your shelter, you can create pest-proof barriers using tightly woven plant fibers or fine mesh around openings. Additionally, applying natural repellents like citronella, garlic, or peppermint oil around the entrance can deter unwanted visitors. Regularly inspect and maintain these barriers, and keep the shelter clean and dry to reduce pest attraction, ensuring a safe and comfortable refuge in the wilderness.
What Is the Ideal Height for Building the Hut?
You should build your debris hut at a height that keeps it safe from ground moisture and pests. Generally, aim for about 12-18 inches off the ground for ideal shelter maintenance and protection. This height helps you stay dry and reduces pest entry, much like effective hunting strategies that focus on safety and concealment. Adjust the height based on terrain, ensuring easy access and stability while maintaining a secure, well-ventilated shelter.
How Do I Safely Disassemble or Relocate the Debris Hut?
When disassembling or relocating your debris hut, prioritize hiking safety and shelter maintenance. Carefully remove the roof and walls, starting from the top to prevent collapse. Use gentle movements to avoid damaging the structure or harming yourself. Clear debris without disturbing surrounding nature. Always plan your move in advance, ensuring you leave no trace. This way, you maintain safety and preserve the environment for future use.
Conclusion
Building a debris hut with leaf litter is a valuable skill that can keep you warm and safe in the wilderness. Remember, studies show that properly insulated shelters can retain up to 90% of body heat, highlighting their importance. By choosing the right location, gathering quality materials, and adding thoughtful touches, you guarantee your shelter’s effectiveness. Keep practicing and refining your technique—your survival skills will only grow stronger with each build.