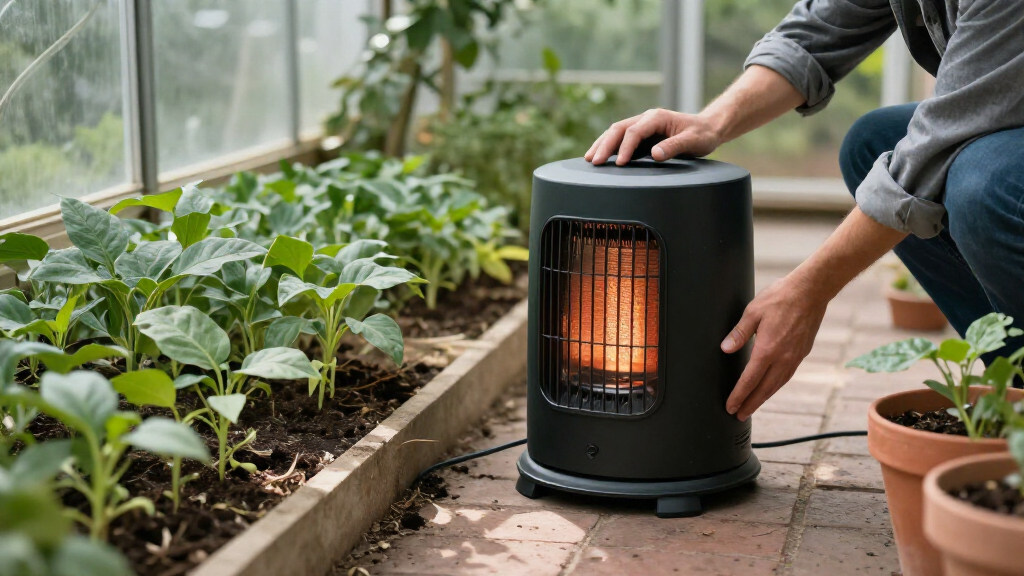
Choose and set up a greenhouse space heater so your plants stay within their preferred temperature range during cold weather. This guide is for home greenhouse owners with basic familiarity using electrical or fuel-burning appliances; no heating experience is assumed. Allow 1-2 hours for measuring, placement, and setup, then monitor the greenhouse over the next several cold periods to adjust the thermostat.

Get garden gear delivered free with Prime
- Fast, free delivery on millions of items
- Prime Video, Amazon Music and more included
- Member-only deals all year

SmterCon Greenhouse Heater with Digital Thermostat
- ✔ Heat output: 1500 W
- ✔ Listed amperage: 15 A
- ✔ Thermostat: Electronic, with digital display and automatic on/off

VEVOR 1500W Greenhouse Heater with 25° Adjustable Angle
- ✔ Power output: 1500 W
- ✔ Voltage: 120 V
- ✔ Amperage: 12.5 A

VEVOR 1500W PTC Greenhouse Heater
- ✔ Power output: 1500 W
- ✔ Voltage: 120 V
- ✔ Amperage: 8.33 A
Difficulty: Beginner | Time: 1-2 hours, plus time to monitor temperatures
What You’ll Need
Tools & Materials:
- Tape measure
- Minimum-maximum greenhouse thermometer or digital thermometer with a remote sensor
- Heater manual and any required mounting hardware
- Outdoor-rated extension cord only if the heater manufacturer permits one
- For fuel-burning heaters: the specified fuel and any manufacturer-required venting equipment
Knowledge:
- How to read the heater’s electrical or fuel specifications
- The minimum and maximum temperatures preferred by the plants in the greenhouse
Check local electrical and fire-safety requirements and follow the heater manual. Use only a heater rated for the greenhouse conditions, including damp or humid locations where applicable. Do not use an unvented fuel-burning heater in an enclosed greenhouse unless its manufacturer and local rules specifically allow it; combustion can create carbon monoxide and add moisture. A carbon monoxide alarm does not make an unsuitable heater safe.
SmterCon Greenhouse Heater with Digital Thermostat
For growers who want the heater to respond to temperature changes, the SmterCon’s digital thermostat and automatic on/off control make it the most decision-ready option here. Instead of depending on a manually chosen heat setting alone, we can set a target and let the unit cycle as needed. That distinction matters in a greenhouse where maintaining a chosen temperature is the goal, although actual results will depend on insulation, outdoor conditions, and the space’s heat loss.Compared with the two VEVOR models, this heater puts more emphasis on temperature management than portability. Its adjustable temperature, wind speed, and ventilation add flexibility, and the manufacturer lists coverage of up to 120 square feet. We would not treat that figure as a guarantee for a greenhouse with poor insulation or unusually cold conditions. The tradeoff is its stated 15 A draw, the highest listed among these three, so buyers should check outlet and circuit requirements carefully. It is also a floor-mounted unit, and its dimensions are not supplied in the same orientation as every other listing, which makes a real-world footprint comparison difficult.Choose it when thermostat control is the priority. If you mainly need a lightweight heater to reposition around a grow tent, the compact PTC VEVOR is easier to carry; if angled heat direction is central, the 25° VEVOR gives a stated adjustment range. The SmterCon’s advantage is automatic temperature response, while its electrical demand calls for the most careful circuit check.
Pros:
- Digital thermostat with automatic on/off control
- Adjustable temperature, fan speed, and ventilation
- Manufacturer lists coverage up to 120 sq ft
- Overheat protection and fire-proof construction are listed
Cons:
- 15 A listed draw makes circuit compatibility an important check
- Listed coverage may not translate to colder or poorly insulated greenhouses
- No weight is provided for comparing portability
Best for: Growers who want a digital temperature display and automatic thermostat cycling in a small greenhouse or grow tent.
Not ideal for: Buyers with limited circuit capacity, or anyone who needs a clearly lightweight unit for frequent repositioning.
Bottom line: The SmterCon is the strongest choice for automatic temperature management, provided its 15 A requirement fits the intended circuit.
“The SmterCon is the strongest choice for automatic temperature management, provided its 15 A requirement fits the intended circuit.”
VEVOR 1500W Greenhouse Heater with 25° Adjustable Angle
The 25° VEVOR is a practical fit when growers want to aim warmth rather than simply place a heater and leave it pointed straight ahead. Its adjustable angle, 1500W output, and separate fan mode give it a useful mix of directed heat and air movement. Compared with the SmterCon, it lacks automatic thermostat cycling and a digital display; compared with the smaller PTC VEVOR, it offers a wider stated angle adjustment.That flexibility comes with a portability compromise. At 7.1 pounds, it is nearly twice the listed weight of the 3.7-pound PTC model, so moving it frequently between benches or tents may become tiresome. Its temperature range is listed as 40°F to 108°F, which gives buyers a defined adjustment span, but the description does not specify an automatic thermostat feature. There is also no built-in timer or remote, so scheduling and adjustments require direct interaction with the unit.This is our pick for growers who value aiming heat at a particular zone and appreciate a fan setting when heat is not needed. The SmterCon is a better fit for hands-off temperature maintenance, while the PTC VEVOR is easier to carry. We would still verify the listed 12.5 A electrical demand against the intended outlet and follow placement instructions, especially in a greenhouse where moisture and nearby materials matter.
Pros:
- 1500W output with heating and fan modes
- 25° adjustable angle helps direct warmth
- Listed temperature range of 40°F to 108°F
- Portable handle, stable base, and overheat protection
Cons:
- At 7.1 lb, it is the heaviest of the three listed models
- No built-in timer or remote control
- 12.5 A listed draw still requires an outlet and circuit check
Best for: Growers who want a floor-standing heater with a broad adjustable angle and a separate fan mode for a small greenhouse or tent.
Not ideal for: Anyone who needs automatic temperature cycling, remote operation, a timer, or a very lightweight heater.
Bottom line: The 25° VEVOR is the best match when adjustable heat direction and fan circulation matter more than automation or low weight.
“The 25° VEVOR is the best match when adjustable heat direction and fan circulation matter more than automation or low weight.”
VEVOR 1500W PTC Greenhouse Heater
When a heater needs to move from one small growing zone to another, the PTC VEVOR has the clearest advantage: it weighs 3.7 pounds, roughly half as much as the other VEVOR. Its compact dimensions, portable handle, and stable base make it the easiest option here to carry and place. It still lists 1500W output, so its appeal is not lower stated wattage; it is lighter handling in a compact form.The simpler controls are the main compromise. This model offers two modes and a manually adjustable 15° angle, while the other VEVOR lists a 25° adjustment and a temperature range. It also lacks the SmterCon’s digital thermostat and automatic on/off function, which makes it less suited to maintaining a target temperature without manual attention. The listed maximum temperature setting is 75°C, but that figure alone does not indicate how quickly or evenly the heater will warm a specific greenhouse.Choose this one for a small tent, flower room, or greenhouse where you expect to relocate the unit and can work with two settings. Compared with the SmterCon, it sacrifices automatic control; compared with the larger VEVOR, it gives up some angle range and listed temperature detail. Its 8.33 A listed amperage is the lowest of these three, though buyers should confirm the actual electrical requirements in the product instructions. Fan noise may also be noticeable in quiet indoor spaces.
Pros:
- Lightest listed unit at 3.7 lb
- Compact 8.27 × 6.3 × 8.66 in footprint
- 1500W output with heat and fan modes
- Cold-rolled steel housing and overheat protection are listed
Cons:
- Only two settings and a 15° angle limit adjustment options
- Fan may be noticeable in quiet settings
- No digital thermostat or automatic temperature cycling is listed
Best for: Growers who want a lightweight heater they can move among small grow tents, benches, or flower rooms.
Not ideal for: Buyers who need a digital thermostat, precise setpoint control, a wider aiming angle, or quiet operation in a shared room.
Bottom line: The PTC VEVOR is the easiest model to reposition, but its basic controls suit growers who can manage settings manually.
“The PTC VEVOR is the easiest model to reposition, but its basic controls suit growers who can manage settings manually.”
As an Amazon Associate we earn from qualifying purchases.
Before You Start
Check the greenhouse for drafts, damaged glazing, gaps around doors, and standing water. Improve insulation and seal simple drafts before buying a larger heater; reducing heat loss can make the space easier and cheaper to warm. Keep plants clear of the heater’s required safety zone, and plan a route for cords or fuel lines where people will not trip over them. Never place a heater where water from irrigation can reach it.
Step-by-Step Instructions
Step 1: Measure the greenhouse
Measure the interior length, width, and average height, then calculate floor area and approximate volume. Record the coldest outdoor temperature the greenhouse usually faces and the lowest temperature your plants can tolerate. Check the heater maker’s sizing guidance against the greenhouse dimensions and local winter conditions; do not choose by floor area alone when the greenhouse is tall, poorly insulated, or exposed to strong winds.
Tip:Heating needs vary with glazing, drafts, wind exposure, and the temperature you need to maintain. If the manual provides a heat-loss or sizing method, use it or ask a greenhouse heating supplier to check the estimate.
Check: You have written down the greenhouse dimensions, expected cold conditions, and a target temperature range for the plants.
Step 2: Choose a suitable heater
Compare heater types that match the greenhouse and its power supply. Electric fan heaters warm air quickly; electric radiant heaters warm nearby surfaces and plants; thermostatically controlled greenhouse heaters can cycle automatically. For any option, check rated output, thermostat range, environmental rating, required clearances, and whether it is intended for unattended operation. If considering fuel, verify ventilation and combustion requirements before purchase.
Tip:Use the heater’s stated wattage and manufacturer sizing advice. Avoid improvised fuel appliances and household heaters that are not rated for damp greenhouse environments.
Check: The heater manual confirms it can be used in the greenhouse conditions and can provide the output needed for your target temperature.
Step 3: Prepare a safe power or fuel supply
Check that the circuit, outlet, plug, and any protective device meet the heater’s electrical requirements. Have a qualified electrician assess the supply if you are unsure about circuit capacity or outdoor protection. Plug the heater directly into a suitable outlet unless the manual explicitly permits a specified extension cord. For fuel models, use only the named fuel and install the required venting exactly as directed.
Tip:Do not use a damaged cord, a coiled extension cord, a multi-outlet adapter, or an outlet that becomes warm during operation. Keep electrical connections above the floor and away from irrigation and condensation.
Check: The supply matches the heater specifications, connections are dry and undamaged, and any required venting is installed.
Step 4: Position and secure the heater
Place or mount the heater on a stable, level, noncombustible surface, following all stated clearances from plants, benches, plastic film, tools, and other materials. Aim a fan heater into open space so warm air can circulate without blowing directly onto delicate foliage. Secure a wall- or ceiling-mounted unit with the specified hardware. Keep the controls accessible and leave a clear path to the plug or shutoff.
Tip:Do not cover the heater or use it to dry gloves, pots, or other items. Keep it out of reach of children and pets, and protect it from accidental knocks.
Check: The heater cannot tip easily, required clearances are open, and no plant, fabric, plastic, or water source touches or faces it at close range.
Step 5: Place the thermometer and set the thermostat
Position the thermometer’s sensor near plant height in a representative growing area, away from the heater’s direct airflow, cold glazing, and direct sunlight. Set the thermostat to the lowest temperature that protects the plants, using their specific needs as the guide. If your heater has separate fan and thermostat controls, set them according to its manual.
Tip:A sensor beside the heater may read warmer than the rest of the greenhouse and switch the unit off too early. For multiple plant zones, use additional thermometers to compare temperatures.
Check: The sensor is measuring the plants’ environment rather than a hot or cold spot, and the thermostat target is recorded.
Step 6: Run the heater and check temperature coverage
Turn on the heater and watch it through a full heating cycle. Check the temperature at plant height in several parts of the greenhouse, including the area farthest from the unit. Confirm that the heater cycles as expected and that air can move around benches. If temperatures vary widely, adjust the heater direction or use a manufacturer-approved circulation fan, keeping plants clear of harsh direct airflow.
Tip:Do not leave a newly installed heater unattended until you have checked its operation and nearby surfaces for unusual heat, odor, or noise.
Check: Temperatures across the growing area remain within the plants’ target range, and the heater switches on and off as intended.
Step 7: Monitor cold nights and adjust
Read the thermometer’s minimum and maximum records each morning during the first cold spell. If the minimum falls below the safe range, check for drafts, verify the thermostat sensor location and setting, and consult the heater’s sizing guidance before changing equipment. If the greenhouse overheats, lower the set point or improve circulation. Record the outdoor and greenhouse readings so you can spot recurring patterns.
Tip:Keep a backup plan for power outages or extreme cold, such as moving vulnerable plants to a protected area. Do not use an open flame or an indoor combustion appliance as an emergency substitute.
Check: Over several cold nights, recorded minimums stay above the plants’ limits without daytime temperatures rising beyond their preferred range.
Common Mistakes to Avoid
- Choosing a heater based only on the greenhouse floor area. — Use the manufacturer’s sizing guidance and account for greenhouse height, glazing, drafts, wind exposure, and the temperature difference you need.
- Putting the thermostat sensor beside the heater or against cold glass. — Measure near plant height in a representative growing area, away from direct heat, sunlight, and cold surfaces.
- Using an indoor heater or an unsuitable extension cord in a damp greenhouse. — Check the heater’s environmental rating and electrical requirements; use a suitable outlet and follow the manual’s cord guidance.
- Blocking airflow or placing plants and combustible materials too close. — Follow required clearances, keep the heater uncovered, and leave space for warm air to circulate.
Troubleshooting
Problem: The greenhouse stays colder than the thermostat setting.
Solution: Check the thermometer against another device, confirm sensor placement and thermostat operation, close obvious drafts, and review whether the heater output suits the conditions. If the circuit trips or the heater behaves unusually, switch it off and have the supply or unit checked.
Problem: One area is warm while plants farther away remain cold.
Solution: Reposition the heater to improve circulation or use a fan approved for the greenhouse. Check temperatures at several plant locations before changing the thermostat setting.
Problem: The heater runs constantly on cold nights.
Solution: Check for heat loss through gaps or damaged glazing and compare the outdoor temperature with the heater’s rated operating conditions. Consult the sizing guidance; do not defeat safety controls or connect an additional heater to an overloaded circuit.
Problem: The greenhouse becomes too hot or humid.
Solution: Lower the thermostat target if plant needs allow, check that the sensor is not in a cool spot, and ventilate when outdoor conditions permit. For fuel-burning equipment, stop use if exhaust, fumes, or abnormal moisture appear and follow the manual’s safety instructions.
What Success Looks Like
The heater is stable, connected and installed according to its manual, and clear of water and combustible materials. The thermostat cycles normally, and thermometer readings near the plants stay within their suitable range through cold nights and daytime warming. There are no tripped circuits, unusual odors, damaged cords, abnormal heat, or combustion fumes.
Next Steps
Check thermometer readings each morning during cold weather and inspect the heater, plug, mounting, and surrounding area regularly. Clean and store or service the unit according to its manual at the end of the season. Reassess the setup if you add plant benches, change glazing, or grow plants with different temperature needs.
Frequently Asked Questions
Can I use a household space heater in a greenhouse?
Only if its manufacturer rates it for the greenhouse’s damp conditions and its installation and electrical requirements can be met. Many household heaters are not intended for humid or wet locations.
Where should I place a greenhouse heater?
Place it on a stable, noncombustible surface or mount it as directed, with the required clearances. Keep it away from irrigation, combustible materials, and direct contact with plants, and aim airflow into open space.
What temperature should I set the heater to?
Set it to the lowest temperature that protects the plants you are growing. Check reliable care guidance for each crop or plant; greenhouse heaters do not have one suitable setting for every plant.
Can I leave a greenhouse heater on overnight?
Only if the heater is designed for the location and unattended operation, installed as directed, and connected to a suitable power or fuel supply. Monitor it during initial use, keep clearances open, and follow the manual’s operating instructions.