TL;DR

Get garden gear delivered free with Prime
- Fast, free delivery on millions of items
- Prime Video, Amazon Music and more included
- Member-only deals all year
Greenhouse space heaters help protect plants from cold, but advertised coverage alone cannot tell you whether a heater will hold your target temperature. Start with your plants’ minimum safe night temperature, your coldest expected weather, and how much heat your greenhouse loses; then choose a suitable heater, thermostat, and backup plan.
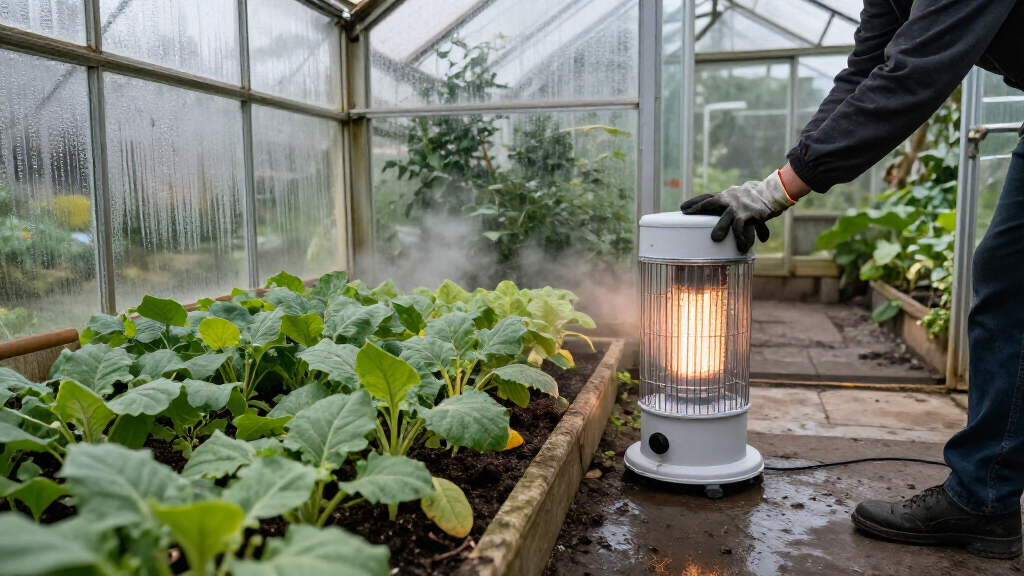
At sunset, the greenhouse glass turns black, and the thermometer beside your seedlings starts sliding down. The heater is running, but a chilly draft still brushes the leaves at bench height. That scene is a reminder: greenhouse space heaters work only as well as the structure and controls around them.
This guide helps you choose a heater based on the temperatures your plants need, the cold your greenhouse must resist, and the energy you can supply. You’ll learn how to compare electric and fuel-burning models, estimate heating needs, reduce heat loss, and set up safer overnight protection. These key facts matter whether you’re overwintering citrus or keeping trays of seedlings from a frost.
Set the heater target from your plants’ minimum safe night temperature and the coldest local outdoor conditions.
Treat coverage claims as rough guidance; glazing, leaks, airflow, and structure size affect real performance.
Compare electric, gas, paraffin, and heat-pump options against your power or fuel supply, running costs, and installation requirements.
Position a thermostat to measure representative conditions at plant height, away from hot outlets and cold drafts.
Follow the heater’s instructions for clearances, ventilation, damp locations, and unattended operation; use an independent low-temperature alarm for valuable p…
Start with the temperature your plants actually need
Choose a greenhouse heater around the lowest safe temperature for your plants, then account for the coldest outdoor nights and the heat your structure loses. A heater’s coverage claim is only a rough guide; it cannot promise a specific indoor temperature in every climate or greenhouse. The temperature target determines how much heat you must supply, while heat loss determines how quickly that heat escapes. Both shape the heater’s workload and your energy bill.
Make a short list of the crops sharing the space. Cool-tolerant greens may handle much lower night temperatures than tropical foliage or newly germinated seedlings. For instance, if your citrus collection needs warmer nights than your lettuce, heating the whole greenhouse to the citrus target can cost more than grouping the citrus behind a thermal curtain. This works because you shrink the volume of air and surface area you need to keep warm, though plants still need enough airflow and room to grow.
Think of the greenhouse like a leaky bucket: the heater pours warmth in while drafts and thin glazing let it spill out. A small, sealed structure in a mild winter may need modest heat, while a larger greenhouse with single-layer glazing in a cold region can lose warmth quickly. Glazing, air leaks, and outdoor lows all change the result. A heater that works on an ordinary night may struggle during a cold snap, when the indoor-outdoor temperature gap is largest and heat escapes fastest.
Write down the coldest expected outdoor temperature and your target temperature at plant height. The gap between them is a useful starting point for sizing, but heat loss still matters. If a seller’s area rating sounds generous, treat it as a clue rather than a guarantee. A reading in the coldest corner during a cold night can show whether the real limitation is heater capacity, drafts, or uneven air circulation.
Popular right now
Vitamix 5200 Professional-Grade Blender, 64 oz. Container, Black

Bose QuietComfort True Wireless Earbuds with Active Noise Cancellation, Black

De'Longhi Dinamica Plus Fully Automatic Espresso Machine
As an affiliate, we earn on qualifying purchases.
Compare heater types before you buy
Electric, gas, and paraffin heaters offer different combinations of control, installation needs, and operating cost. The best fit depends on reliable power, available fuel, greenhouse dampness, ventilation, and the heat your plants require. These factors are linked: a low purchase price may mean higher running costs, while a powerful fuel-burning unit may need flueing and careful installation that a small greenhouse cannot accommodate.
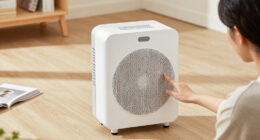
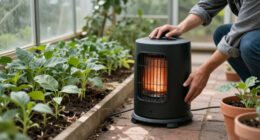
An electric heater can be easy to control and produces no combustion exhaust inside the greenhouse. It may suit a small hobby setup with dependable power, though local electricity prices can make long winter nights expensive. Choose equipment rated for its location and follow its instructions in damp conditions; a household heater is not automatically suitable for greenhouse use. Its simple controls can help maintain steady temperatures, but they cannot compensate for an unreliable power supply or a circuit that is not suitable for the load.
Natural gas or propane can supply substantial heat where fuel is available. Direct-fired units release exhaust and moisture into the greenhouse, while flued models send combustion gases outdoors. That difference affects both air quality and condensation: venting exhaust outside can reduce added moisture, but requires proper installation. Paraffin or kerosene heaters can fit some small setups, but they need careful fuel handling, ventilation, and attention to fire safety. Heat pumps can be efficient in suitable climates and installations, though upfront cost and outdoor conditions shape their performance; their savings depend on how often they run and how much heat the greenhouse loses.
| Heater type | Potential fit | What to check |
|---|---|---|
| Electric | Reliable power and simple control | Energy cost and damp-location rating |
| Gas | Available fuel and substantial heat demand | Venting, ventilation, and maintenance |
| Paraffin or kerosene | Some small setups | Fuel handling, clearances, and ventilation |
| Heat pump | Suitable climate and installation | Upfront cost and actual cold-weather performance |
For example, a grower with reliable electricity may favor an electric thermostat-controlled unit for a small propagation area. A larger greenhouse with fuel access may need a different arrangement. Compare the full setup, not just the heater’s price tag: purchase cost, energy use, installation, ventilation, and maintenance all affect whether the heater remains practical through a full winter.
Size and place your heater for the coldest corner
Estimate heater capacity from the temperature gap you need to bridge and the heat your greenhouse loses, then check the manufacturer’s sizing guidance. Heater wattage or fuel input describes capacity, but it does not account for every draft, glazing type, cold snap, or airflow problem. If capacity is too low, the heater may run continuously and still miss the target; excessive capacity can cost more upfront and may cause larger temperature swings if the controls are poor.
For instance, imagine a single-layer greenhouse in a windy spot. A heater rated for a large area might keep the air beside its outlet warm while seedlings on the far bench stay cold. Before buying, inspect seams, doors, glazing, and the foundation for gaps; sealing leaks or adding a thermal curtain can reduce the heat escaping each night. Fixing a draft may improve temperatures throughout the space more effectively than adding capacity, but it will not eliminate the need for adequate heat during severe cold.
Use a circulation fan to move warm air through the space, since heat can gather near the roof while leaves below remain chilly. A fan spreads warmth; it does not create it. This can reduce temperature differences between benches, though the heater still needs enough capacity to replace heat lost through glazing and leaks. Keep plants and coverings clear of hot outlets, and don’t direct intense heat at foliage.
Place the thermostat where it measures conditions representative of your plants. A sensor beside the heater may switch the unit off while the far corner remains cold, while a sensor in a draft can make the heater run longer than needed. If you can, compare readings near plant height, near the roof, and in the coldest corner. Measure where the plants live, not where the heater blows. Those readings help distinguish a sizing problem from poor placement or circulation, so you can address the actual cause.
Cut heat loss before turning up the thermostat
Reduce heat loss first when you can: seal gaps, improve insulation, and heat only the area your plants need. These steps can lower demand without forcing your heater to run harder through every cold night. Less heat escaping means the heater can spend more time maintaining a stable temperature and less time trying to catch up after the greenhouse cools.
Single-layer glazing loses heat quickly. Double-layer coverings, thermal screens, and an insulated foundation can help retain warmth, though the best improvement depends on your structure and budget. These additions have tradeoffs: they may cost money and, if poorly fitted, can limit light or airflow. Even a door that doesn’t close snugly can undermine an otherwise capable heater; feel around the frame on a cold evening for a thin ribbon of moving air.
Grouping pots close together can also make it easier to protect a smaller area. For instance, if you are overwintering a handful of tender herbs, a thermal curtain around one bench may mean you can maintain a warmer pocket instead of heating the full greenhouse. The smaller heated area can reduce energy use, but make sure the plants still receive enough light and airflow, and leave access for watering and inspection.
A thermostat helps avoid unnecessary heating and large temperature swings. Set it based on the plants’ needs, and avoid placing the sensor in direct sun, beside the heater, or in a cold draft. A connected sensor may send remote alerts, but it should not be your only safeguard: a network or power failure can leave you unaware of a falling temperature. Better heat retention often does more than simply buying a larger heater because it reduces the heat the system must replace each hour.
Keep fuel, electricity, and overnight heating safer
Run a greenhouse heater overnight only if its instructions allow unattended operation and you have installed it exactly as directed. Greenhouses combine damp air, plants, coverings, and sometimes fuel, so safe clearances and suitable equipment matter as much as heat output. A setup that warms the space but ignores these conditions can create a fire, electrical, or air-quality hazard while no one is there to notice it.
Keep heaters away from water and combustible materials, and use electrical equipment rated for the location. Follow required clearances and ventilation instructions. For fuel-burning equipment, pay particular attention to exhaust, oxygen supply, carbon monoxide risk, and maintenance. Never use an outdoor-only heater inside unless its instructions explicitly permit that use. A flue or ventilation system must work as intended; merely opening a door or window may not provide reliable protection.
Unvented combustion can add moisture to the air as well as warmth. That extra water vapor may increase condensation on cold glazing and contribute to conditions that encourage plant disease. Ventilation helps manage air quality, but too much ventilation can waste heat; follow the heater’s directions and local safety rules rather than guessing. This tradeoff is one reason to consider whether a properly flued appliance or non-combustion heat source better suits a damp greenhouse.
Use a low-temperature alarm independent of the thermostat for valuable plants or freezing conditions, and make a backup plan for fuel or power failure. For example, a grower with rare orchids might arrange a second heat source or a way to move plants to a protected space if the main heater fails. A heater cannot guarantee frost protection when the system stops, the unit is undersized, or cold air finds a gap. An alarm gives you time to respond, but only if someone can act on it.
Use a simple checklist to choose the right setup
A good heater choice begins with your plant temperature target and ends with a safe plan for the coldest night. Work through the same short checklist before comparing product claims, and you’ll have a clearer basis for the decision. Each step narrows the options: the target sets the heat demand, while the structure and energy supply determine what can meet it reliably.
- Set your target: Identify the minimum safe night temperature for the plants you plan to protect. If crops need different conditions, consider grouping them.
- Check your climate: Note the coldest expected outdoor temperature and the temperature gap the heater must cover.
- Inspect the structure: Look for leaks, thin glazing, and uninsulated areas. Decide whether sealing or a thermal curtain can reduce heat loss.
- Compare the supply and appliance: Check local energy prices, fuel access, damp-location suitability, ventilation needs, and manufacturer sizing guidance.
- Plan monitoring and backup: Place the thermostat near representative plant conditions and consider an independent low-temperature alarm.
For example, a gardener starting tomato seedlings might first group the trays, seal a drafty door, and record temperatures at bench height through a cold night. Those readings offer a better starting point than choosing by greenhouse floor area alone. If the target is still missed after leaks are sealed, the readings can guide a decision about added heater capacity or better air circulation.
Choosing one involves more than matching an advertised heater area to your greenhouse size. Heating only the space you need, using thermal curtains, and grouping plants can reduce demand. A heat pump or renewable electricity may suit some installations, but upfront cost, climate, and energy access shape whether they make sense for yours. The most practical setup is one that can maintain the target through the coldest likely nights, with controls and a backup plan you can depend on.
Frequently Asked Questions
What size heater do I need for my greenhouse?
Estimate the heat needed from your greenhouse’s heat loss, the coldest expected outdoor temperature, and the minimum indoor temperature your plants need. Manufacturer sizing charts can help, but a coverage claim alone may not reflect your glazing, drafts, or local weather.
What is the cheapest greenhouse heater to run?
There is no single cheapest option for every greenhouse. Compare local electricity and fuel prices, heater efficiency, the temperature you need, and how well your greenhouse retains heat; sealing leaks may lower demand more than changing heater types.
Can I leave a greenhouse heater on overnight?
Only if the heater is designed for unattended operation and installed according to its instructions. Use a suitable thermostat, keep combustibles clear, and consider an independent temperature alarm for valuable plants or freezing nights.
Are electric heaters safer than gas heaters?
Electric heaters avoid combustion exhaust inside the greenhouse, but damp conditions still create electrical and fire risks. Gas heaters also require careful selection, ventilation or flueing, clearances, maintenance, and compliance with their instructions.
Do greenhouse heaters need ventilation?
Requirements depend on the heater. Fuel-burning models may need ventilation or a flue, so follow the manufacturer’s directions and local safety rules; never assume an enclosed greenhouse is safe for an unvented appliance.
Will a heater prevent frost damage?
A correctly sized, working heater can help protect plants from frost, but it cannot guarantee protection. Cold spots, drafts, power failures, or a sudden temperature drop may still leave plants exposed.
Conclusion
Choose a heater for the temperatures your plants need, then make the greenhouse hold onto that warmth with sealed gaps, smart placement, and a well-positioned thermostat. Follow the equipment instructions, especially for ventilation and clearances, and keep a backup plan for a failed heater or power supply.
On a frosty morning, the best setup is the one that leaves your plants standing in calm, even warmth—not the one with the biggest number on its box.