
To make a simple plant press, gather lightweight, durable wood like plywood and assemble layers of absorbent material such as newspaper or blotting paper, securing them with straps or bolts for even pressure. When collecting plants in the field, use clean tools and lay each specimen flat between absorbent layers to dry. Place the press in a dry, ventilated area and check regularly; if you want to master the process, there’s more to discover below.
Key Takeaways
- Use lightweight, durable wood and straps or bolts to construct a portable plant press for field use.
- Collect healthy plant parts with clean tools, arranging them flat on absorbent materials like newspaper or blotting paper.
- Layer specimens with absorbent sheets and cardboard, then secure tightly to ensure even pressure during drying.
- Carry the press to a dry, ventilated area and allow at least a week for complete drying, checking specimens regularly.
- Properly dried, flattened specimens remain crisp and intact for study, documentation, and future reference.
Ever wonder how to preserve plant specimens accurately while you’re out in the field? When you’re eager to document the diversity of nature, mastering plant preservation is essential. Using simple field collection techniques, you can effectively gather and press plants, ensuring they stay intact for later study or appreciation. The key is creating a reliable, portable plant press that makes the process straightforward and effective.
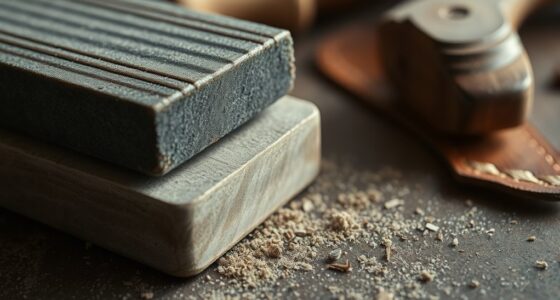
Start by choosing sturdy materials for your plant press—typically, a wooden frame made of lightweight but durable wood, like plywood or pine. The size should suit your collection goals, but a common dimension is about 12 inches by 18 inches. Your goal is to create a structure that holds plants flat and secure during drying. To do this, you’ll need some straps or bolts to tighten the press, along with a few layers of absorbent material like cardboard, newspaper, or blotting paper. These layers are crucial for plant preservation because they facilitate airflow and moisture removal.
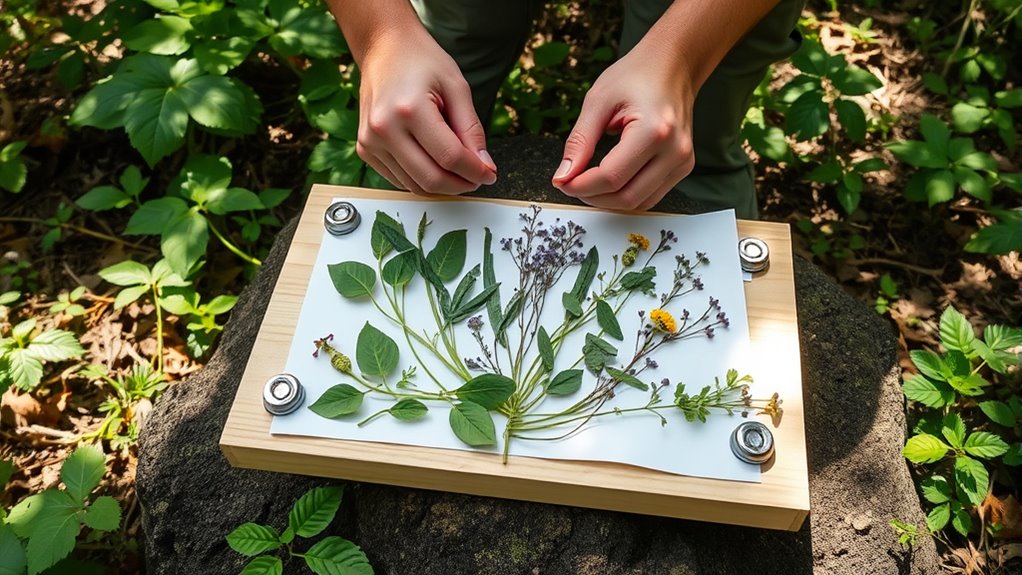
When collecting plants in the field, use careful techniques to minimize damage and ensure your specimens are suitable for pressing. Cut the plant with clean scissors or pruners, selecting healthy, undamaged parts—flowers, leaves, or stems—that best represent the species. Place the specimens flat on a piece of newspaper or blotting paper, arranging them to display key features clearly. Avoid overlapping parts too much, as this can hinder proper drying and identification later.
Once your specimens are prepared, position them inside your homemade plant press. Lay a layer of absorbent material beneath, then place your plant flat on top, making sure to spread out the parts for maximum visibility. Cover the plant with another sheet of absorbent material, then add a layer of cardboard or additional paper, repeating the process for multiple specimens. Secure everything tightly with straps or bolts, turning the screws or tightening the straps until everything feels snug. This pressure is vital for effective plant preservation because it flattens and dries the specimens evenly.
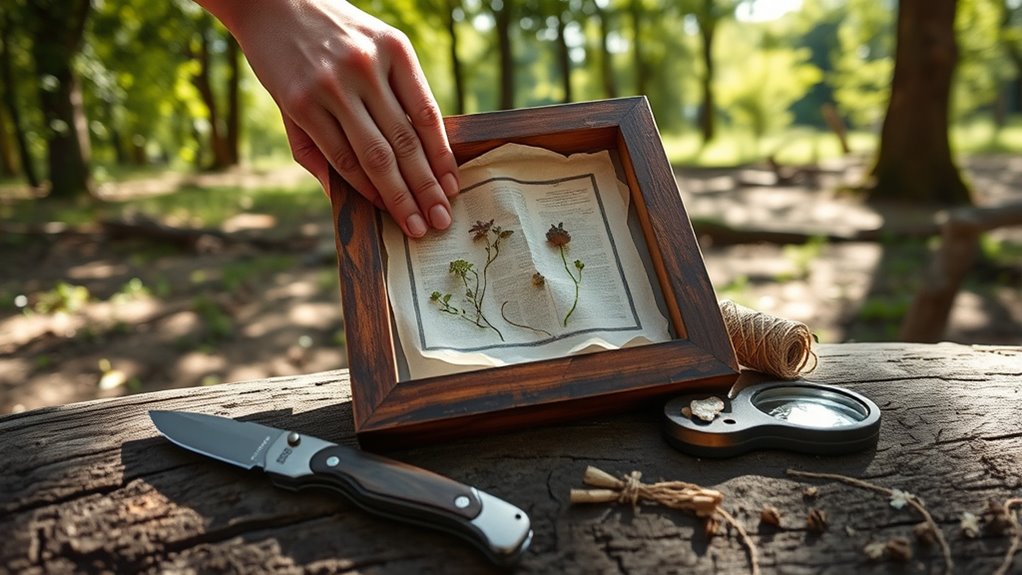
As you carry your plant press back from the field, remember that patience is key. Keep the press in a dry, well-ventilated area, and allow your plants to dry completely—usually a week or more—before handling or storing them. Regularly checking the bulb condition and ensuring proper maintenance can help prevent issues during drying. Proper field collection techniques combined with a well-constructed plant press will give you preserved specimens that are crisp, flat, and ready for study or display. With a bit of practice, you’ll find this simple setup becomes an invaluable tool in your exploration of the plant world, freeing you to focus on discovery while ensuring your specimens remain intact for years to come.

Aboofx Mini Flower Press Kit for Small Flowers Drying, Beginners-Travel Outdoor, Presses Plant, Leaves, Herbs, Micro Flowers, 2.5 x 4 Inch Pocket Pressed Flower Kit for Classroom, Arts Craft Lovers
【Effortless Flower Press Design】: Simply layer blooms between pressing boards! This flower preservation kit delivers vibrant pressed flowers…
As an affiliate, we earn on qualifying purchases.
As an affiliate, we earn on qualifying purchases.
Frequently Asked Questions
What Are the Best Materials for a DIY Plant Press?
For a DIY plant press, you should consider material alternatives that balance press durability and ease of use. Cardboard or recycled paperboard works well for the layers, but opt for lightweight, sturdy options like plywood or foam core for the frames. You get the freedom to customize your press, ensuring it’s both strong enough to handle pressure and easy to carry. Choose materials that inspire your exploration and let your botanical freedom flourish.
How Do I Prevent Mold During Pressing?
To keep mold at bay during pressing, embrace your freedom by focusing on proper drying techniques. guarantee your plants are thoroughly dried before pressing, using good airflow and low humidity. Change absorbent materials regularly, like newspapers or blotting paper, to prevent moisture buildup. Store your pressed specimens in a well-ventilated, cool place once dried. This way, you stay in control, enjoying vibrant, mold-free plants whenever you desire.
Can I Press Large or Heavy Plants Effectively?
Yes, you can press large or heavy plants, but you need to take into account plant weight and press size limitations. Use a sturdy, appropriately-sized press to handle heavier specimens, and add extra support like additional padding or weight plates to distribute pressure evenly. Be mindful that larger plants may require more time to dry thoroughly. Adjust your press setup to ensure proper flattening without risking damage or mold growth.
How Long Should Plants Stay in the Press?
You should leave plants in the press for about one to two weeks, depending on their size and moisture content. For example, if you’re pressing a large fern, it might take closer to two weeks. Use proper drying techniques and preservation tips like changing blotting papers regularly to prevent mold. Keep the press in a dry, warm spot to guarantee your plants stay intact and vibrant, freeing your curiosity to explore nature’s beauty.
What Maintenance Is Required for the Press?
You should regularly maintain your press by inspecting it for wear and tear. Clean the pressings and cleaning tools after each use to prevent mold and dirt buildup. Tighten any loose bolts or screws to keep the press functioning smoothly. Store it in a dry, cool place when not in use, and periodically check for rust or damage. Proper maintenance guarantees your plant press remains effective and ready for your next adventure.

Forestry Suppliers Plant Press Straps – Set of 2 Adjustable Spring Buckle Straps, 1″ x 84″ – Durable Securing Straps for Herbarium & Botany Plant Presses
Heavy-Duty Polypropylene Webbing – Reliable, rugged material stands up to repeated use in field or classroom environments.
As an affiliate, we earn on qualifying purchases.
As an affiliate, we earn on qualifying purchases.
Conclusion
So, you’ve just learned how to make and use a simple plant press—surely the most complicated thing you’ll do today. Now, armed with your newfound skills, you’re ready to conquer the world of plant collecting. Ironically, the real challenge is resisting the urge to press every plant you see. But hey, with your trusty press, you’re all set to turn even the most mundane leaf into a masterpiece—who knew pressing could be this exciting?

Cauaoa 2-Pack Nature Exploration Tools – Ergonomic Scoopers and Clamps for Field Research and Outdoor Activities, Durable Plastic Design with Non-Slip Grip
ERGONOMIC DESIGN: Features comfortable non-slip grips for extended use during field research and nature exploration activities
As an affiliate, we earn on qualifying purchases.
As an affiliate, we earn on qualifying purchases.

AIOWZZY Large Wooden Flower Press Kit 11" x 8" Multi-Layer Plant Press for Dried Flowers Plant Preservation for DIY Arts Dried Flowers Craft Tool
EMBOSSING KIT: You will receive 1 x large flower press 24 x absorbent paper, 10 x cardboard, 8…
As an affiliate, we earn on qualifying purchases.
As an affiliate, we earn on qualifying purchases.