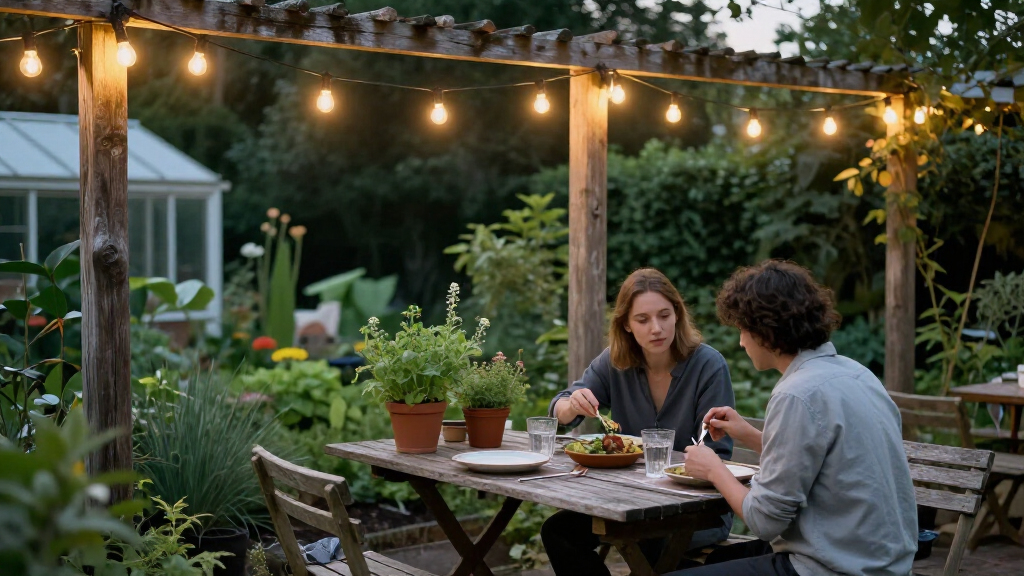
Install outdoor string lights by choosing a suitable layout, placing secure supports, hanging lights with enough clearance, and testing the connections. This guide is for beginners lighting a patio, deck, yard, or similar outdoor area. Allow 1-3 hours, depending on the size of the area and whether you need to add support posts.

Get garden gear delivered free with Prime
- Fast, free delivery on millions of items
- Prime Video, Amazon Music and more included
- Member-only deals all year

OHLUX 110 ft Dimmable Outdoor String Lights with 52 Shatterproof G40 LED Bulbs
- ✔ Length: 110 ft
- ✔ Bulbs: 52 G40 LED bulbs
- ✔ Color temperature: 2200 K

Svater 50 ft Solar String Lights with Remote
- ✔ Length: 50 ft
- ✔ Bulbs: 18 G40 LEDs plus 1 spare
- ✔ Charging: Solar or USB

3-Pack Warm White Christmas Mini String Lights, 150 Lights per 33-Foot Strand
- ✔ Quantity: 3 strands
- ✔ Length: 33 ft per strand; 99 ft total
- ✔ Lights: 150 per strand; 450 total
Difficulty: Beginner | Time: 1-3 hours
What You’ll Need
Tools & Materials:
- Outdoor-rated string lights with compatible bulbs
- Tape measure
- Outdoor-rated extension cord, if needed
- Outdoor-rated hooks, screw eyes, or cable hardware suited to the supports
- Ladder rated for your weight and the surface where it will stand
- Pencil or removable marker
- Drill and suitable bit, if installing screw-in hardware
- Helper for holding and positioning the light strand
Knowledge:
- Basic measuring and ladder safety
- How to identify a suitable outdoor outlet
- How to use a drill if installing screw-in supports
Check the light set and hardware labels for outdoor use. Use lights and cords with ratings suited to the location and conditions. If the installation requires new electrical wiring, work near overhead power lines, or calls for supports you cannot safely install, contact a qualified electrician or contractor.
OHLUX 110 ft Dimmable Outdoor String Lights with 52 Shatterproof G40 LED Bulbs
For a fixed patio or yard with access to an outlet, the OHLUX 110-foot strand is the strongest all-around fit in this group. Its 52 warm 2200K G40 LEDs spread a soft, inviting glow over a larger area than the 50-foot Svater set, and the shatterproof bulbs are a practical choice where lights hang above a walkway or seating. An IP45 rating and indoor/outdoor design also make it better suited to outdoor use than the LJLNION mini lights, which need protection from water.The appeal is coverage with room to expand: OHLUX says up to 15 strings can connect end to end, so we can plan a long run without relying on several separate power points. Brightness is dimmable, but a dimmer is not included; buyers should account for that extra component and verify compatibility before planning around dimming. This is a mains-powered set, so it is less flexible than Svater when a garden has no convenient outlet. Choose it for a dependable, long decorative run; skip it if solar operation or a complete dimming setup out of the box is essential.
Pros:
- 110-foot strand covers a larger area than the 50-foot Svater set.
- Shatterproof G40 LEDs and IP45 water resistance suit outdoor hanging.
- Warm 2200K light is dimmable with a compatible dimmer.
- End-to-end connection supports larger layouts; spare bulbs and fuses are included.
Cons:
- A dimmer is not included.
- Requires a 120 V AC power source, limiting placement away from outlets.
Best for: Patio and pergola owners who have access to a 120 V outlet and want long, warm LED coverage that can be extended.
Not ideal for: Buyers who need a solar-powered set or expect dimming controls to be included.
Bottom line: For long outdoor runs near an outlet, OHLUX balances coverage, warm LED light, and expandability better than the other picks, provided we source a compatible dimmer separately.
“For long outdoor runs near an outlet, OHLUX balances coverage, warm LED light, and expandability better than the other picks, provided we source a compatible dimmer separately.”
Svater 50 ft Solar String Lights with Remote
Where running an extension cord would complicate the setup, Svater’s solar or USB charging gives this 50-foot set a clear advantage over both mains-powered alternatives. It has 18 shatterproof G40 bulbs, a rechargeable battery, and automatic dusk-to-dawn operation, so it can suit a garden path, fence, or seating corner without keeping the lights plugged into an outlet. The remote, touch control, and four lighting modes add options the straightforward OHLUX strand does not list.Its flexibility comes with limits. At 25 lumens and 18 bulbs, Svater is primarily ambient decoration; it is not the pick for lighting a large dining area as brightly as possible. It also covers less distance than OHLUX, and solar charging depends on a suitable sunny location. USB charging provides another route, but the cable and remote battery are not included. Compared with LJLNION’s dense 150-light strands, Svater has a more open, bulb-by-bulb look, with the benefit of IP44 water resistance and no incandescent bulbs to replace.
Pros:
- Solar or USB charging gives more placement flexibility than the AC-powered picks.
- Dusk-to-dawn operation and remote or touch control simplify routine use.
- Shatterproof bulbs and an IP44 rating are suited to outdoor use.
- Includes a spare bulb, ground plug, and fixing screws.
Cons:
- USB charging cable and remote battery are not included.
- 18 bulbs and 25 lumens provide decorative rather than strong functional light.
- Solar charging requires suitable sun exposure for dependable operation.
Best for: People decorating a garden, fence, or seating nook without a nearby outdoor outlet who want automatic operation and adjustable effects.
Not ideal for: Anyone needing bright task lighting, a long connected run, or a complete kit with charging cable and remote battery included.
Bottom line: Svater is the most convenient choice for an outlet-free outdoor nook, though its shorter, lower-brightness strand is less suited to broad coverage than OHLUX.
“Svater is the most convenient choice for an outlet-free outdoor nook, though its shorter, lower-brightness strand is less suited to broad coverage than OHLUX.”
3-Pack Warm White Christmas Mini String Lights, 150 Lights per 33-Foot Strand
The LJLNION set takes a different approach to outdoor string lighting: instead of large patio bulbs, it supplies three 33-foot strands with 150 incandescent lights each. Closely spaced bulbs create a denser line of warm-white light than the G40 layouts on OHLUX and Svater. That makes these strands a better match for wrapping shrubs, railings, or seasonal displays across several separate spots. With three cords in the set, we can arrange the strands independently rather than commit to one long run.The tradeoff is outdoor care. These lights are not water resistant, so they must be kept out of water and protected from exposure; their intended indoor/outdoor use does not make them a fit for an uncovered installation in rain. They also use incandescent bulbs, which may need replacement over time, unlike the LED options here. Connectability up to four sets can extend a display, and replacement bulbs and fuses are included, but this remains the least weather-ready choice. Pick it for sheltered, removable decorations where dense coverage matters more than all-season convenience.
Pros:
- Three separate 33-foot strands provide 99 feet total.
- 150 bulbs per strand create denser coverage than the G40 options.
- Can connect up to four sets and includes replacement bulbs and fuses.
- UL certified and specified for indoor or outdoor use when protected from water.
Cons:
- Not water resistant; needs protection from water and exposed weather.
- Incandescent bulbs may require replacement over time.
- Green wire may be more visible on light-colored walls or open patio structures.
Best for: Decorators who want many closely spaced warm lights across shrubs, railings, or multiple sheltered areas and can take them down or protect them from water.
Not ideal for: Buyers seeking permanent, exposed outdoor lighting, LED efficiency, or widely spaced patio bulbs.
Bottom line: LJLNION is the best fit for dense, sheltered decorative displays, but its lack of water resistance makes it a poor choice for an exposed patio run.
“LJLNION is the best fit for dense, sheltered decorative displays, but its lack of water resistance makes it a poor choice for an exposed patio run.”
As an Amazon Associate we earn from qualifying purchases.
Before You Start
Read the light manufacturer’s instructions before planning the run. Check the total strand length, whether the set can connect to additional sets, and the maximum permitted load. Do not connect more strands than the manufacturer allows. Locate the outlet and plan a route that keeps cords away from walkways, standing water, hot surfaces, and places where doors or gates can pinch them.
Measure the full route, including the slack needed for gentle curves and connection points. Choose attachment points that can carry the lights and resist wind. A fence panel, thin trim, or tree branch may not be a suitable support. Keep the lights high enough to avoid people, furniture, and open doors, while following the manufacturer’s clearance guidance. Do not install lights in wet or windy weather.
Step-by-Step Instructions
Step 1: Plan and measure the light route
Sketch the light route and mark its start, end, corners, and support points. Measure each section and compare the total with the strand’s usable length. Leave slack for gentle curves and connections instead of stretching the strand tight. Choose a power cord route that reaches the outlet without crossing a walking path.
Tip: Check the outlet’s location and the light set’s maximum connectable length before buying or hanging anything.
Check: You have a route with measured sections, reachable supports, and a power connection point that does not create a trip hazard.
Step 2: Choose the right supports and hardware
Identify solid attachment points, such as structural posts, masonry with appropriate anchors, or purpose-installed support posts. Select hooks, screw eyes, or a support cable that match the surface and light set. For long spans, install a properly anchored support cable so it carries the tension instead of the light sockets or electrical cord.
Tip: Do not rely on adhesive hooks outdoors unless their maker rates them for the surface, temperature, moisture, and load in your location.
Check: Each planned attachment point can hold the expected load, and the hardware fits the support material.
Step 3: Install the attachment points
Mark each support location. Drill pilot holes where the hardware instructions call for them, then install each hook or eye firmly. Fasten into masonry with anchors made for that specific wall material. If using a support cable, install its rated eye bolts, cable, and tensioning hardware according to their instructions. Keep hardware clear of electrical lines and concealed services.
Tip: Use a stable ladder on level ground, and have a helper steady it and pass up materials. Do not overreach; move the ladder instead.
Check: The hooks or cable fittings sit firmly in their supports and do not turn, pull out, or shift under a gentle hand check.
Step 4: Lay out and inspect the lights
Keep the string lights unplugged while you inspect them. Check the cord and sockets for cuts, cracks, loose parts, corrosion, or signs of overheating. Seat each bulb as the instructions specify and fit any required seals or covers. Replace damaged equipment instead of trying to repair it with tape.
Tip: Use only bulbs of the type and wattage specified for the set.
Check: The cord, sockets, bulbs, and plug show no visible damage, and the equipment is suitable for outdoor use.
Step 5: Hang the lights without stressing the cord
With a helper, attach the strand or support cable at the first point, then work along the route. Secure the strand at the intervals recommended by the manufacturer, adding support at corners and long spans. Leave a gentle curve between points; do not pull the cord taut, make the sockets carry cable tension, or create tight bends. Keep the plug end near the planned power source.
Tip: If bulbs are heavy or the span is long, hang the support cable first and fasten the light strand to it with suitable clips.
Check: The lights hang evenly, the cord is not stretched, and every support remains steady as the strand is positioned.
Step 6: Connect the lights to power
Follow the manufacturer’s instructions for the plug, outlet, and any required outdoor-rated cover or protection. Connect only approved strands, and use an outdoor-rated extension cord if needed. Keep plug connections off the ground and away from puddles and sprinklers; fit a connection cover rated for the location when required. Do not modify plugs or force incompatible connectors together.
Tip: Use a ground-fault circuit interrupter (GFCI)-protected outlet for outdoor equipment. If the outlet lacks suitable protection or you are unsure about it, ask an electrician to check it.
Check: The plug connections are fully seated, protected as directed, and positioned away from water and foot traffic.
Step 7: Test the installation and make adjustments
Plug in the lights and check every section from the outlet to the far end. Confirm the bulbs illuminate, the plug and cord remain cool, and the strand stays supported. Unplug the set before adjusting a bulb, moving a hook, or correcting a connection. Plug it in again after adjustments and recheck the full run.
Tip: Use a timer or controller only if it is rated for outdoor use and compatible with the light set.
Check: All sections light consistently, the supports hold, and the route leaves clear space for people to move beneath and around it.
Common Mistakes to Avoid
- Stretching the strand tight between supports. — Leave a gentle curve and let suitable support hardware carry the load. Tension can damage cords, sockets, or attachment points.
- Using indoor lights, cords, or connectors outside. — Check the labels and instructions for outdoor use before installation. Replace equipment that lacks the required rating.
- Connecting more strands than the set permits. — Read the manufacturer’s limit and follow it. Use separate approved power connections if the layout exceeds that limit.
- Leaving a cord across a walkway or near water. — Route cords along a wall or other protected path, secure them against movement, and keep plugs and connectors clear of wet areas.
Troubleshooting
Problem: The lights do not turn on.
Solution: Unplug the set, then check that the outlet has power, the GFCI has not tripped, bulbs are seated correctly, and all plugs are fully connected. Test with the manufacturer’s recommended method. Replace a faulty set; do not open or splice a sealed cord.
Problem: Only part of the strand lights.
Solution: Unplug the lights and inspect the unlit section for loose or failed bulbs and damaged sockets. Replace bulbs only with compatible types. If the section remains dark or a socket looks damaged, stop using the set and follow the manufacturer’s service guidance.
Problem: A hook or support starts to pull loose.
Solution: Unplug the lights and take the strand’s weight off that point. Reinstall suitable hardware into a stronger support or add a properly anchored support post or cable before rehanging.
Problem: The GFCI trips when the lights are connected.
Solution: Unplug the set and inspect the plug, cord, connectors, and outlet area for moisture or damage. Let wet connections dry only as the manufacturer directs, then check for damage. Do not bypass the GFCI; have a qualified electrician investigate if it trips again.
What Success Looks Like
The completed installation has an even, gently curved run of outdoor-rated lights held by secure supports. The cord and connectors are undamaged, connections stay clear of water and walking paths, and all bulbs illuminate during a test. The route leaves safe clearance for people and doors, and no plug, socket, or cord becomes unusually warm.
Next Steps
Switch off or unplug the lights before cleaning, replacing bulbs, or adjusting hardware. After strong wind, heavy rain, or freezing weather, inspect the supports, cord, sockets, and connections before using the set again. Store removable lights dry and protected when they are not in use, following the manufacturer’s storage instructions. If you see cracked insulation, corrosion, loose supports, or repeated power trips, stop using the set until the problem is corrected.
Frequently Asked Questions
Can I leave outdoor string lights up all year?
That depends on the lights’ rating, the local weather, and the manufacturer’s instructions. Inspect them regularly and take them down if conditions exceed their rating or the cord and supports begin to deteriorate.
How high should I hang outdoor string lights?
Set the height to clear people, furniture, and doors along the full route, and follow any clearance guidance from the manufacturer or local rules. Check the lowest point of a sagging span, not only the attachment height.
Can I connect two sets of string lights?
Connect sets only when the manufacturer says the model supports end-to-end connection, and stay within its stated maximum. Do not assume similar-looking sets have compatible plugs or load ratings.
Do outdoor string lights need a special outlet?
Use an outdoor outlet with GFCI protection and follow the light set’s instructions for weather protection. Ask an electrician to inspect or install an outlet if its condition or protection is unclear.
Halloween Picks
halloween
As an affiliate, we earn on qualifying purchases.